SSO Integration with Microsoft Entra ID (formerly Azure AD)
These are instructions for setting up dbdiagram SAML SSO with Microsoft Entra ID. If you use a different identity provider and need assistance with configuration, please contact us.
Add a new Enterprise Application
-
Add new Enterprise application
In Microsoft Entra ID, select the
Overviewtab in the left sidebar. Click on + Add > Enterprise application to add a new enterprise application.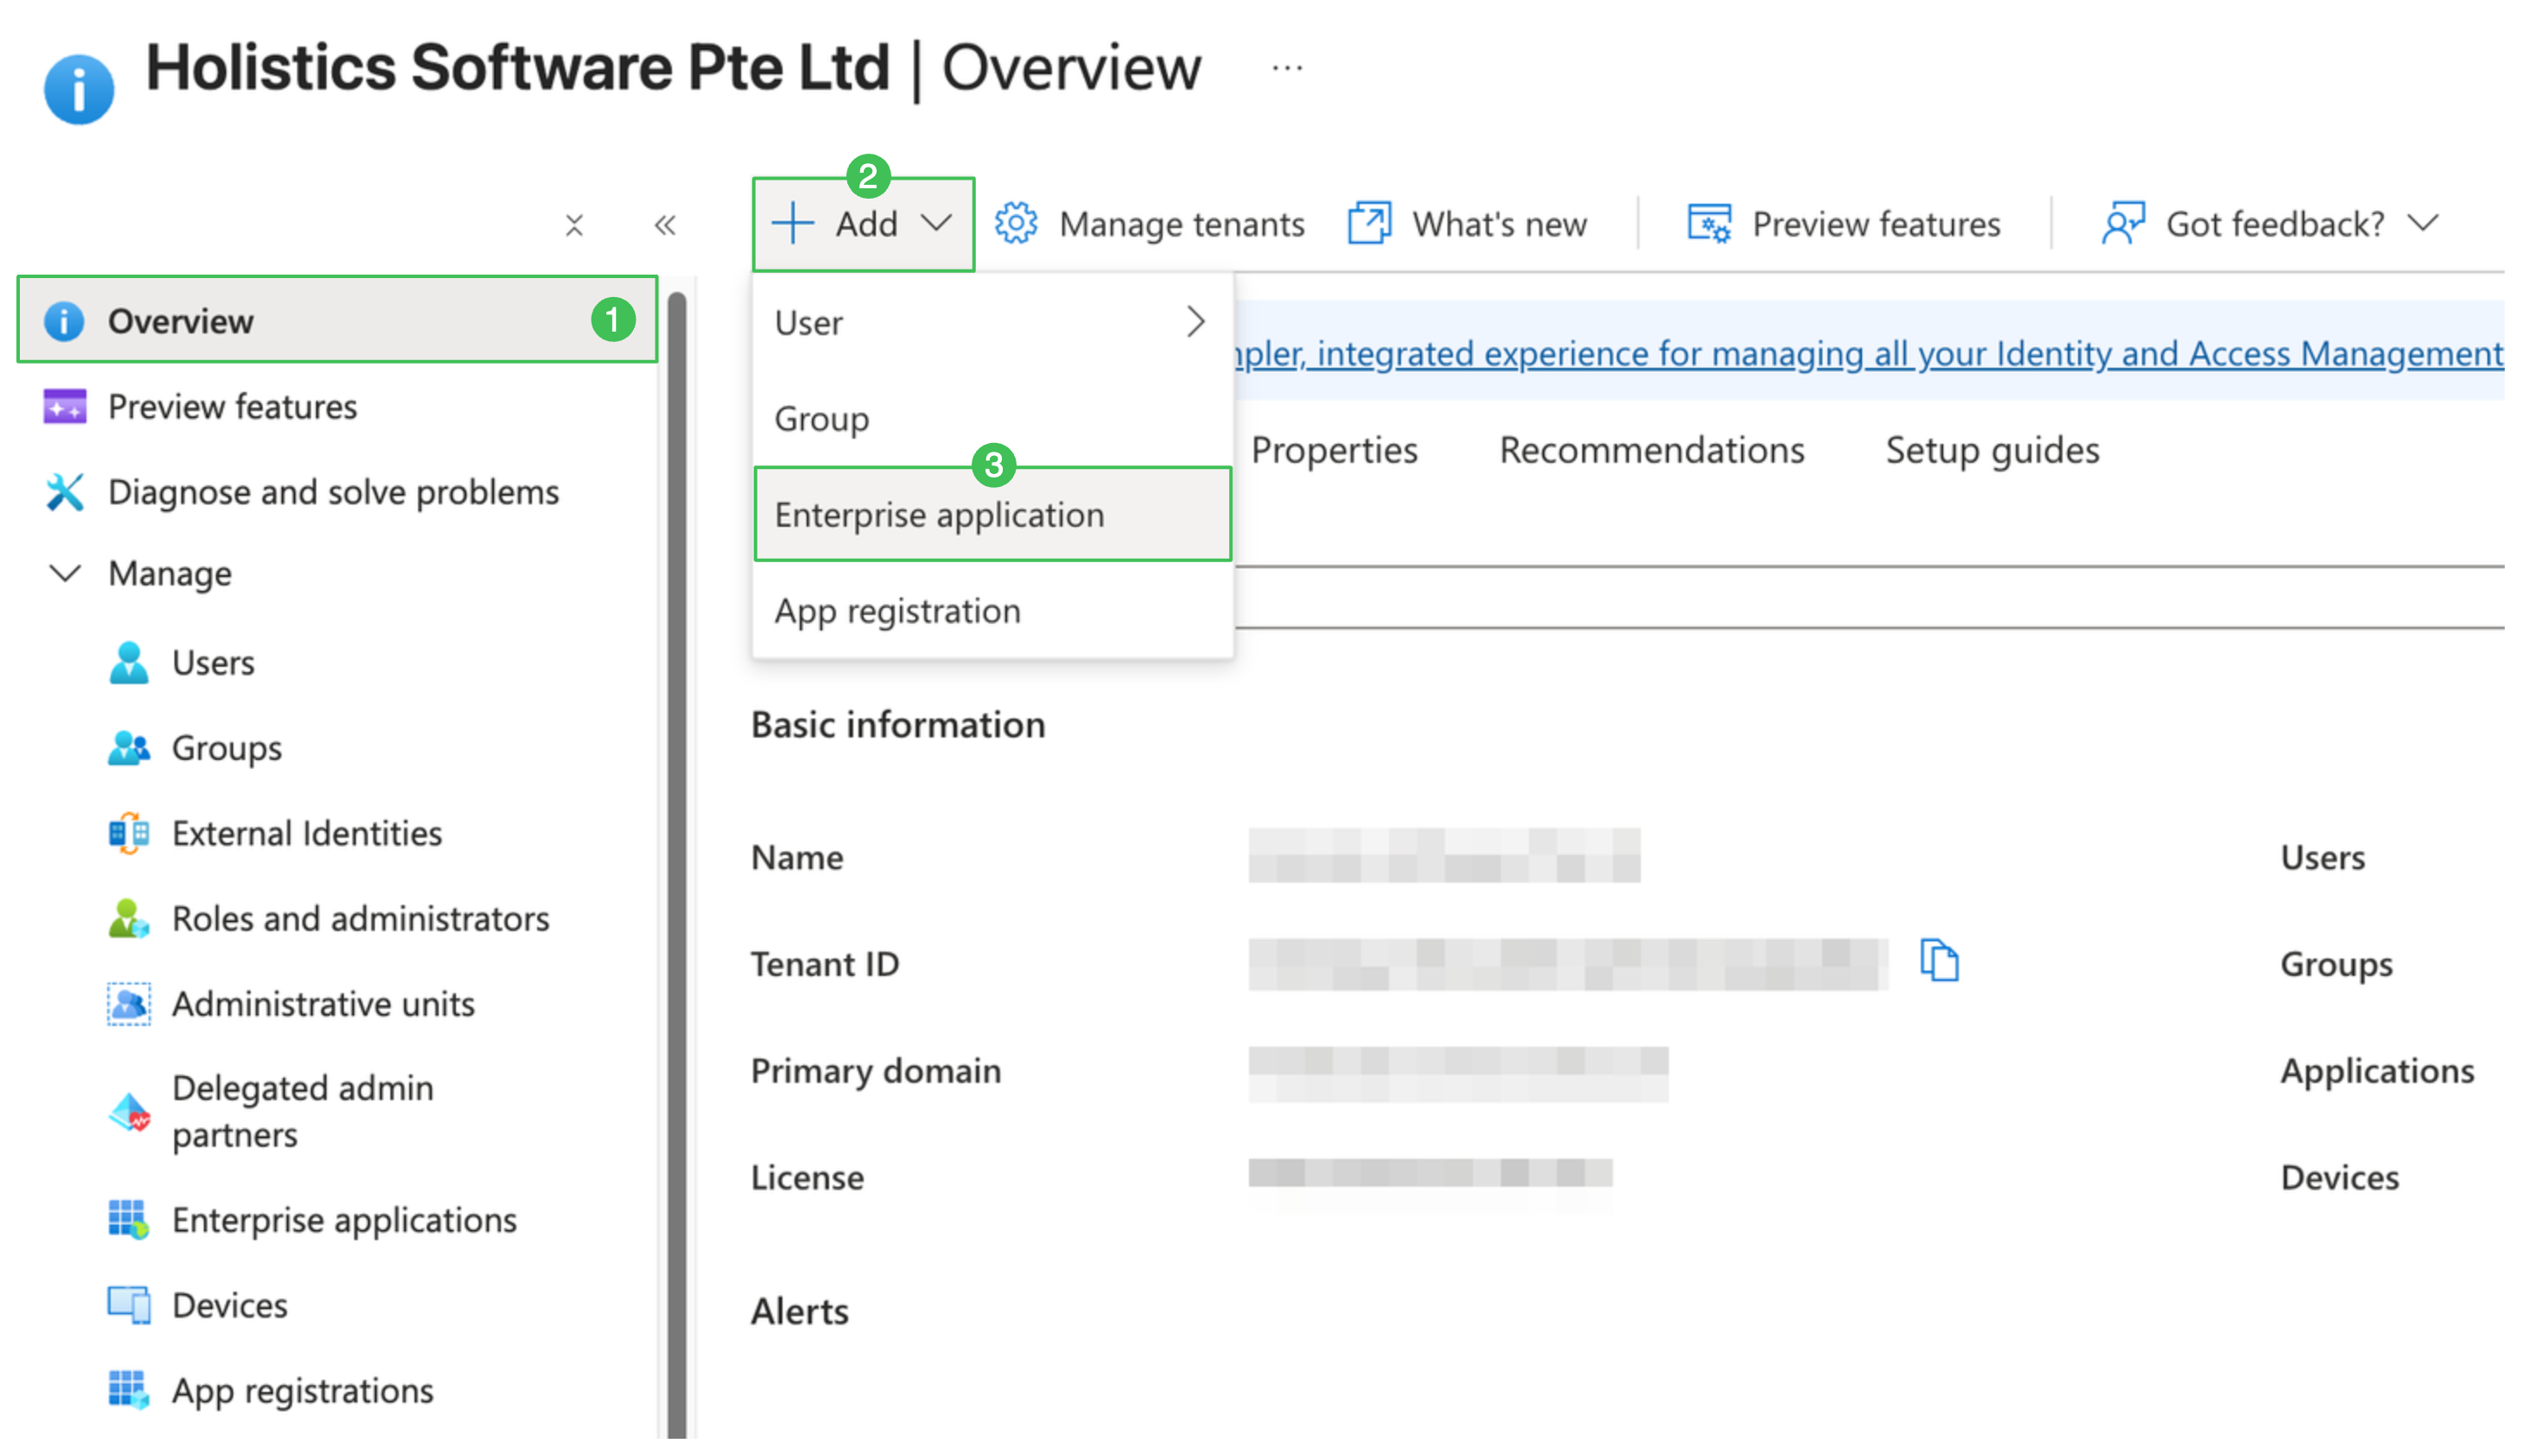
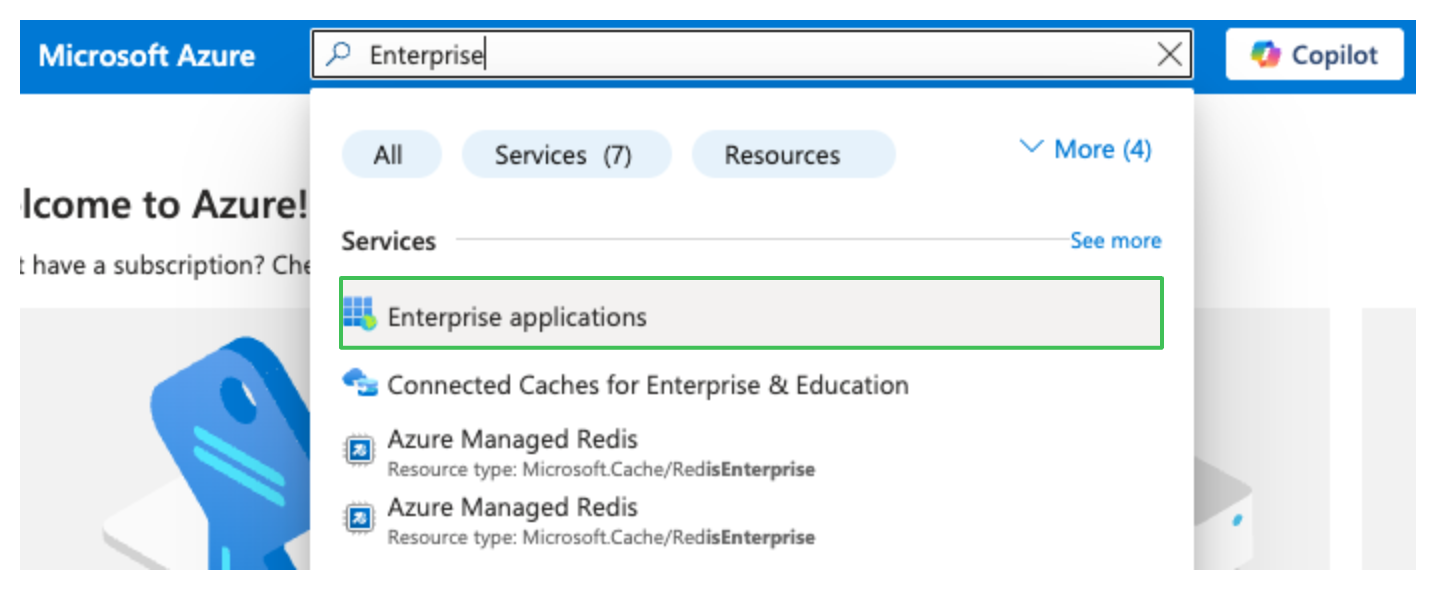
or, you can find Enterprise applications directly in the Search Bar to open Enterprise applications section.
Then, click + New application:

-
Click Create your own application and enter
dbdiagramin the name field, then click Create
Add Users and Groups
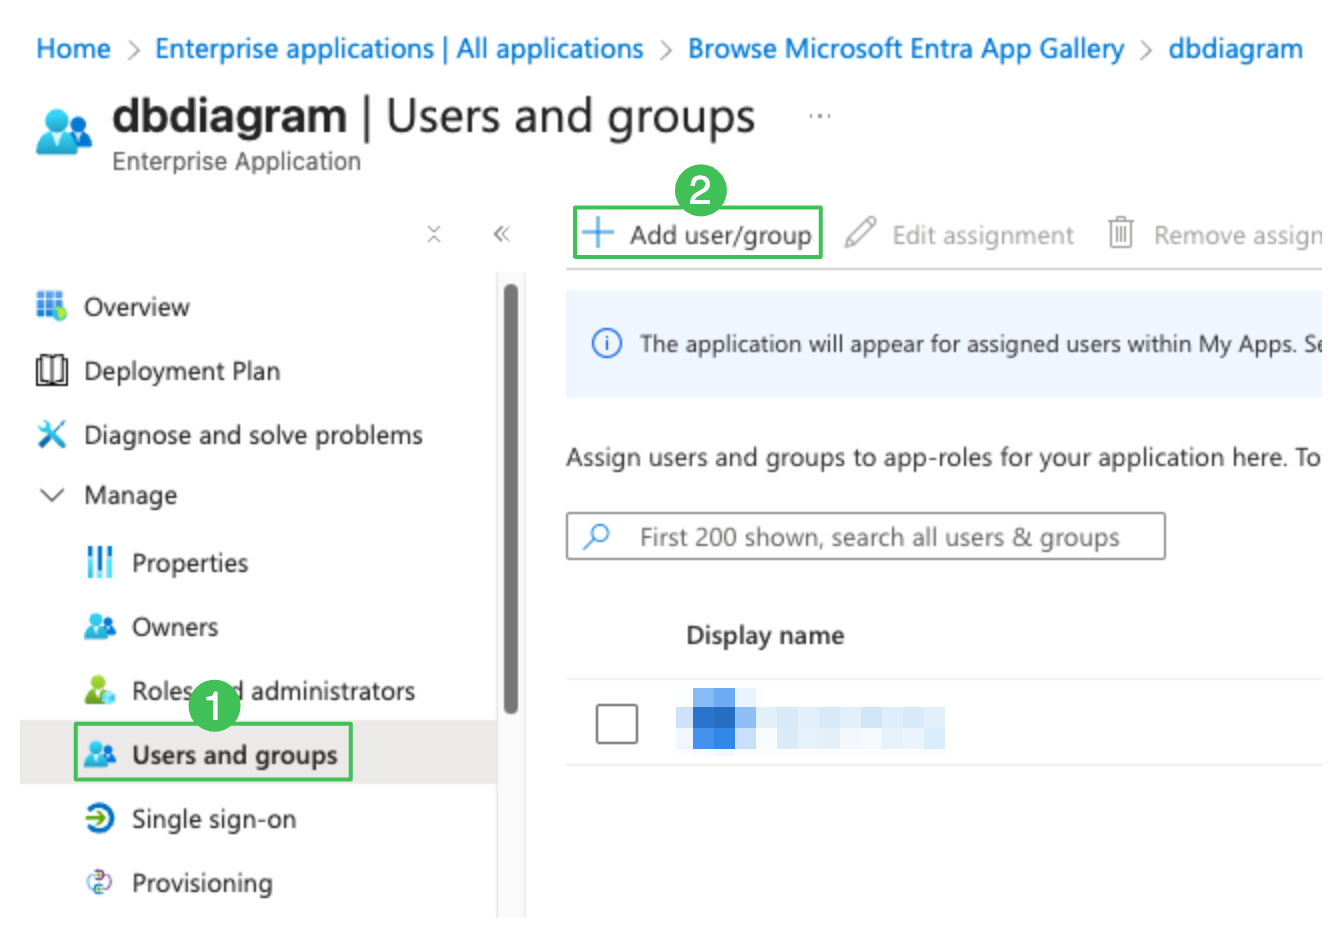
Click on the newly-created dbdiagram application. Then, select Users and Groups in the left sidebar. Finally, add your users into this application.
Configure Single Sign-on with SAML
In the dbdiagram application overview, click on Single sign-on on the left sidebar. Select SAML as the sign-on method.
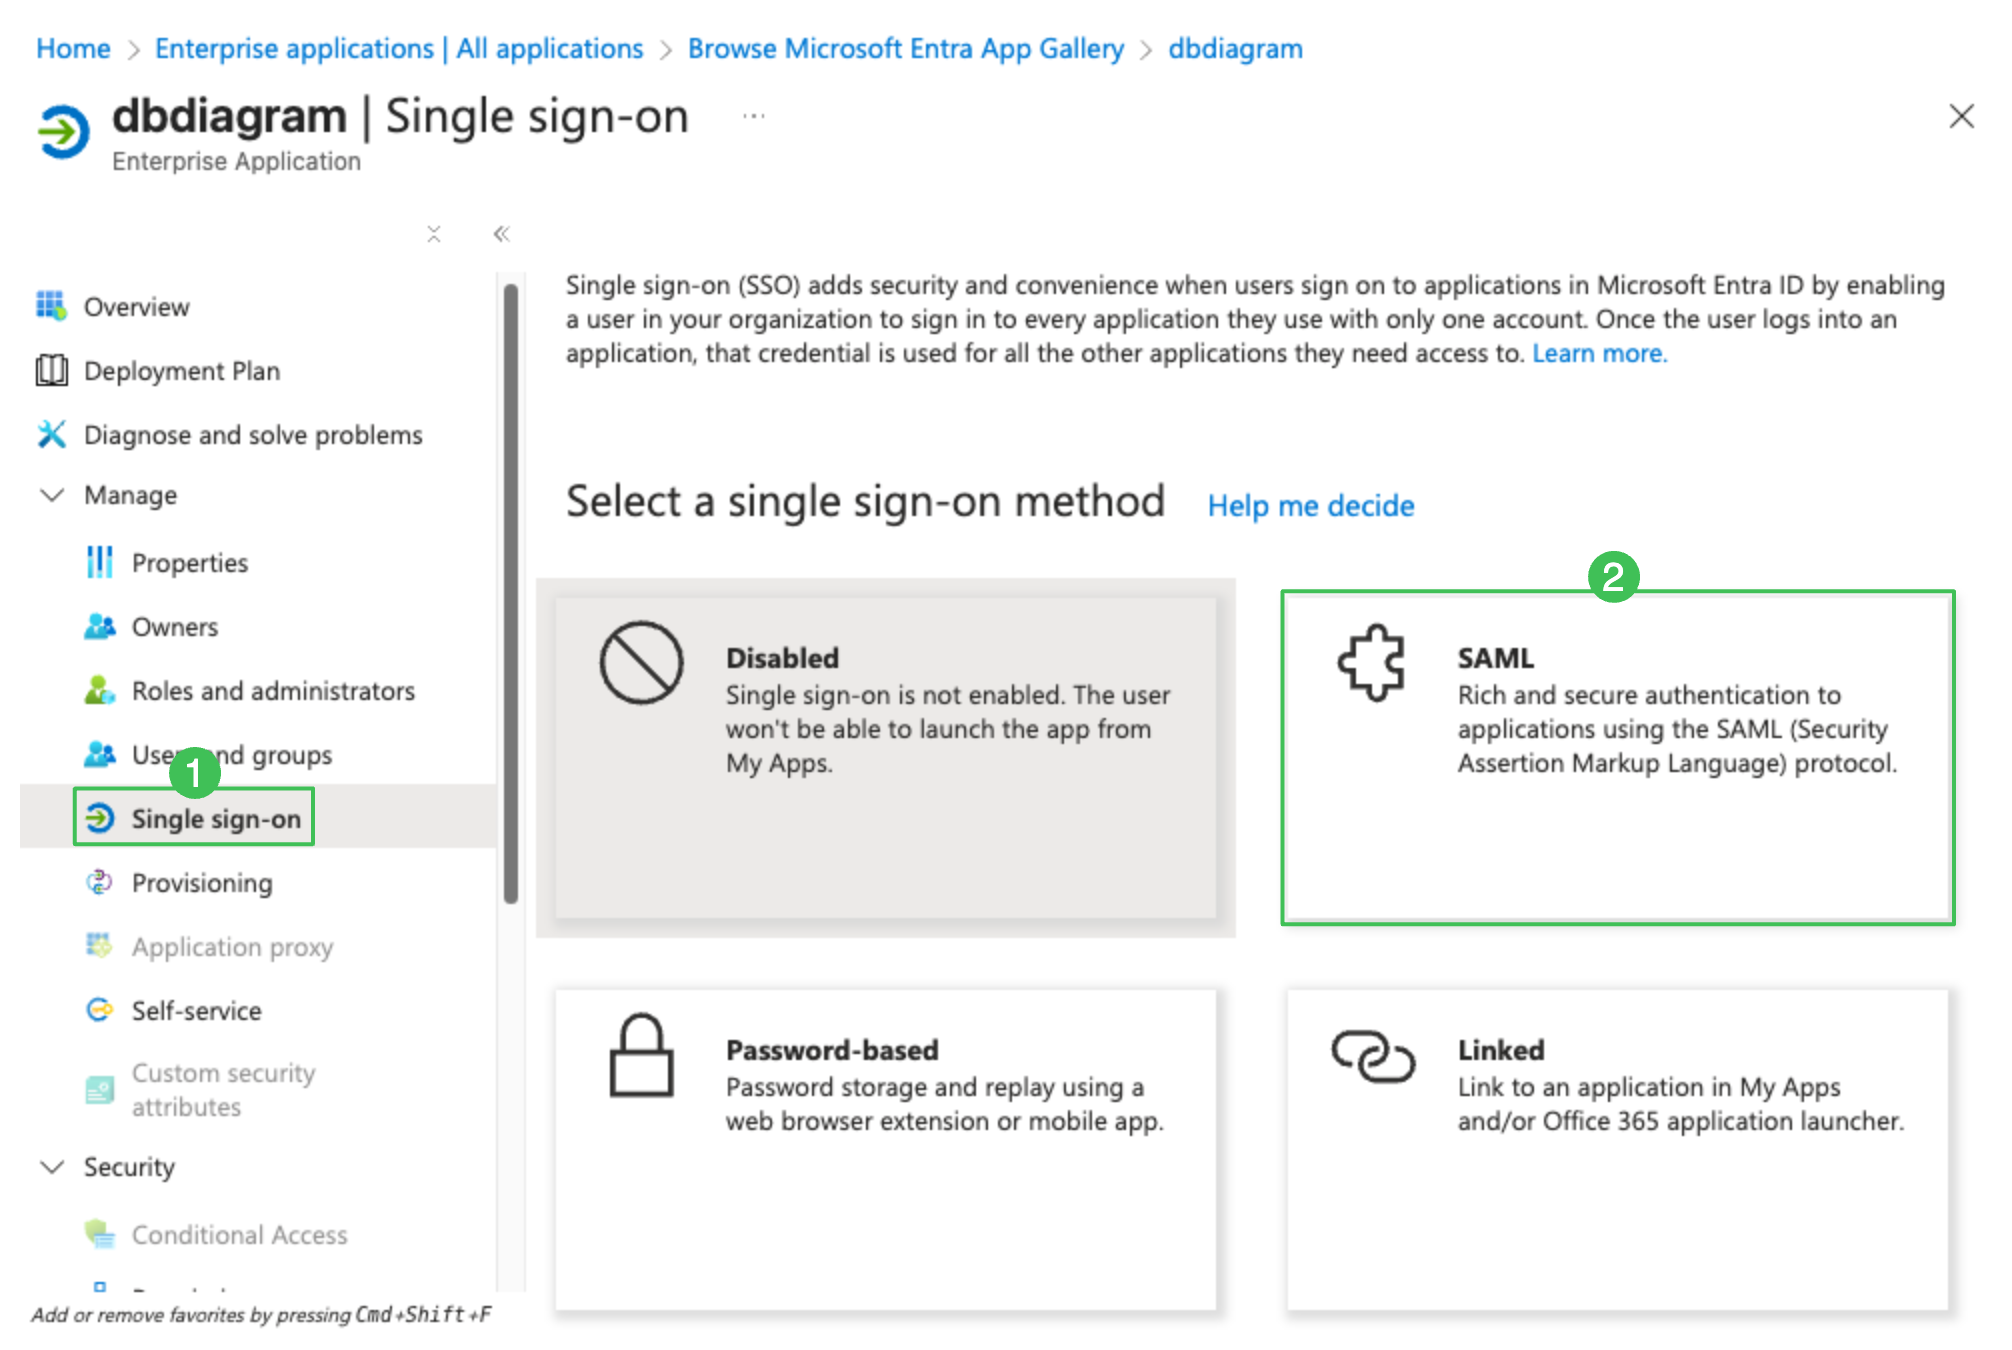
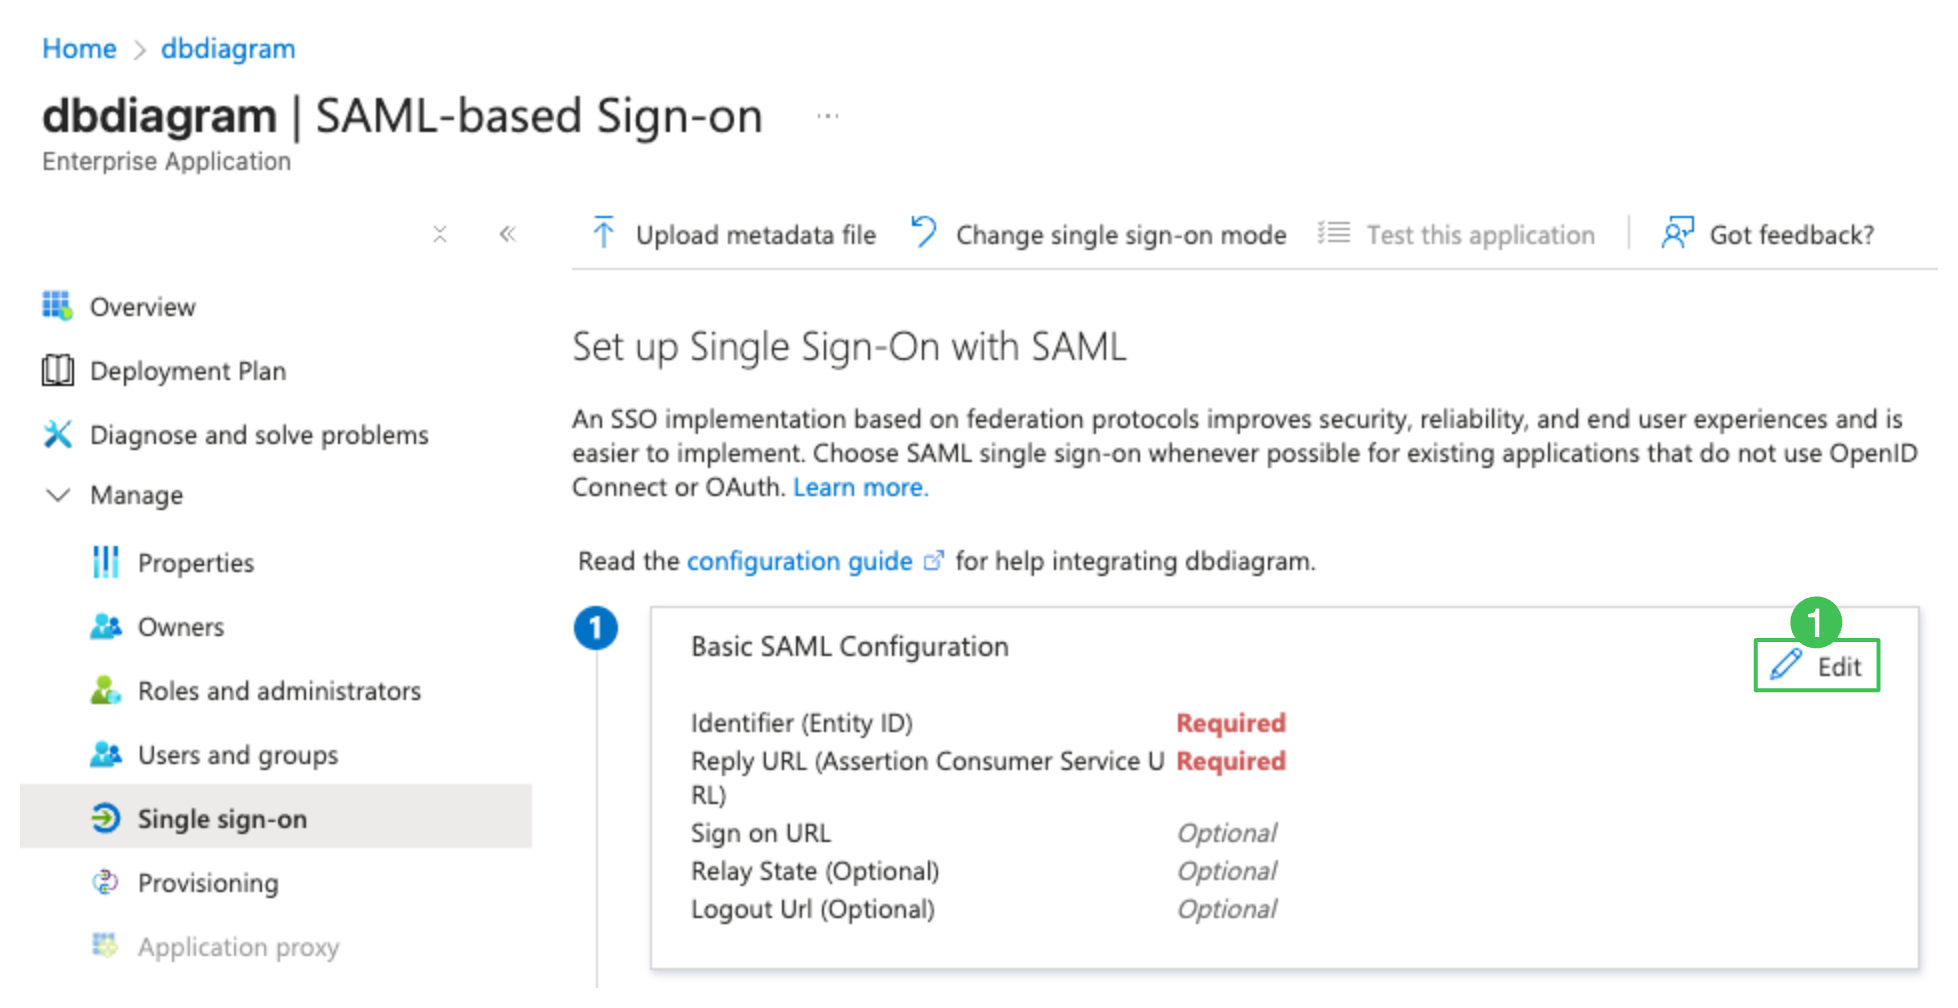
Section 1: Basic SAML Configuration section
-
Click Edit in the Basic SAML Configuration section (section 1).
Fill in Identifier and Reply URL fields. You can find them in the Workspace Settings. Remember to toggle Authenticate with SSO (SAML) to on first.
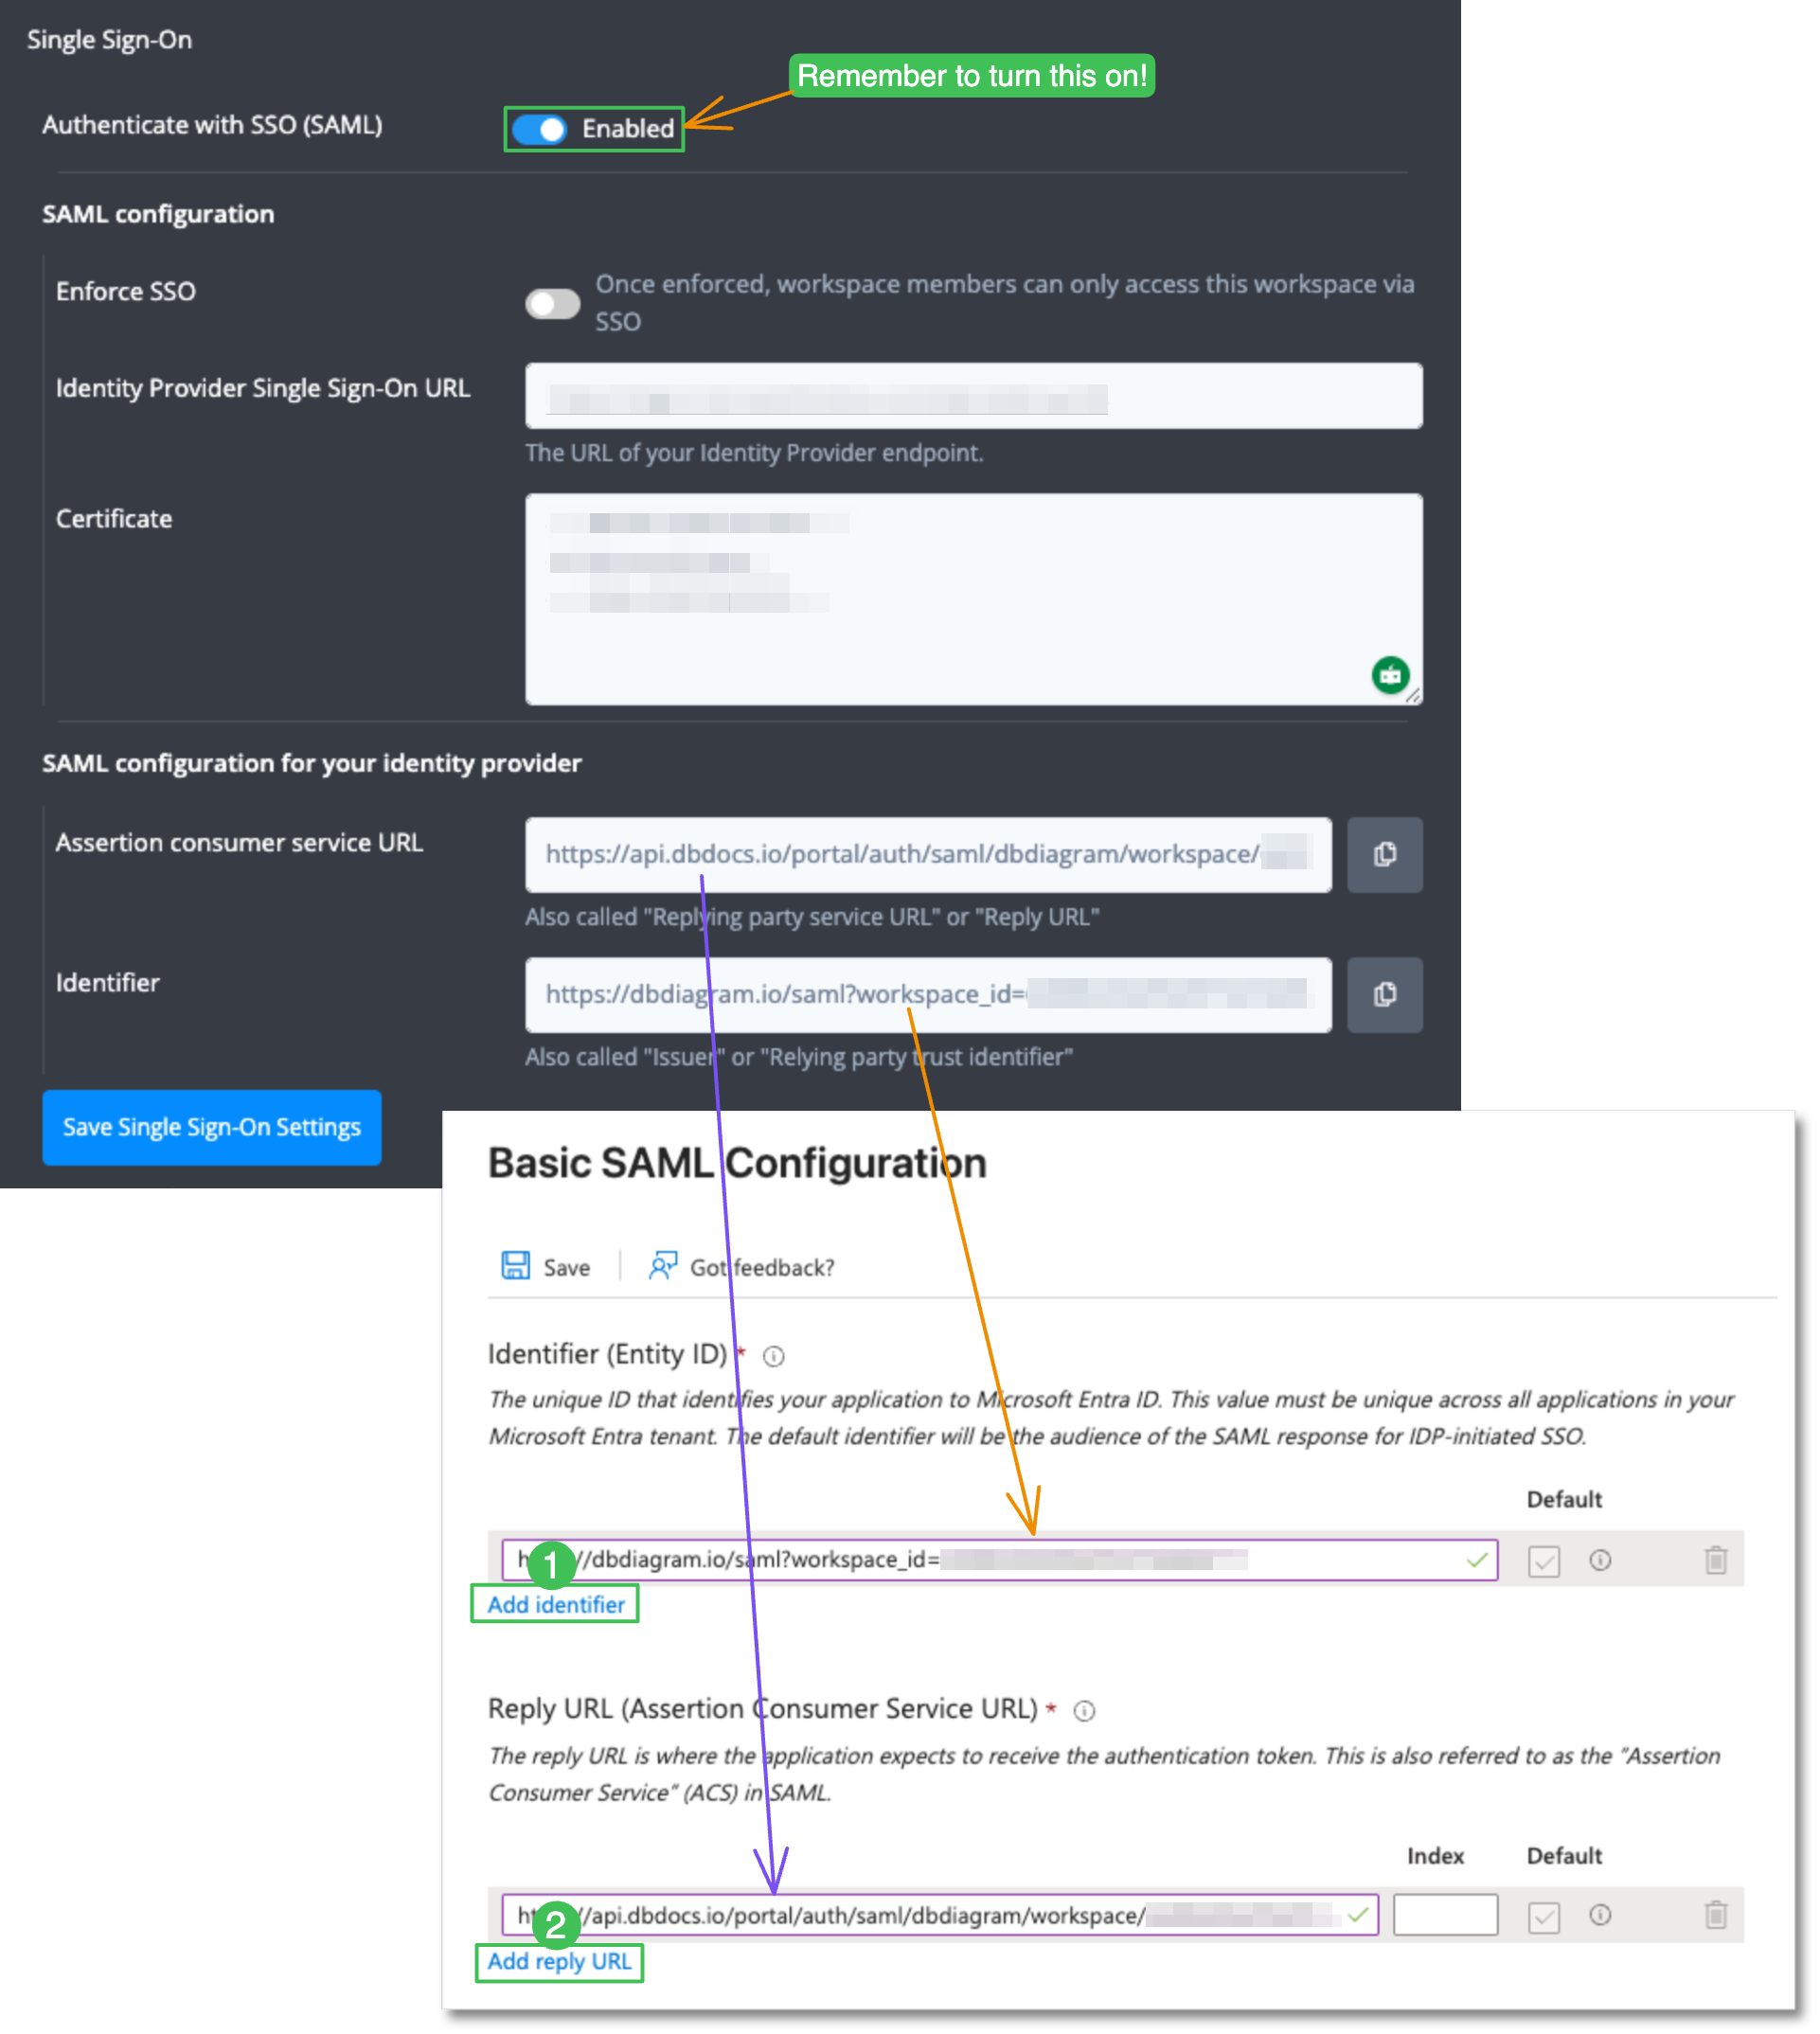
-
Click Save to save the configuration.
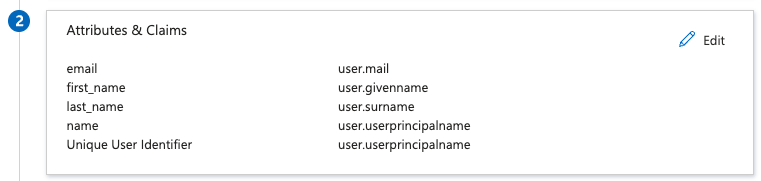
Section 2: Attributes & Claims section
-
Click Edit on the Attributes & Claims section. You will need to edit every line in the Additional claims section. Click on each line to begin the editing. Remove the namespace section in all the records.
Change emailaddress attribute name to emailBy default, there is an attribute name emailaddress in Microsoft Entra ID. Change this into email to conform to dbdiagram configurations.
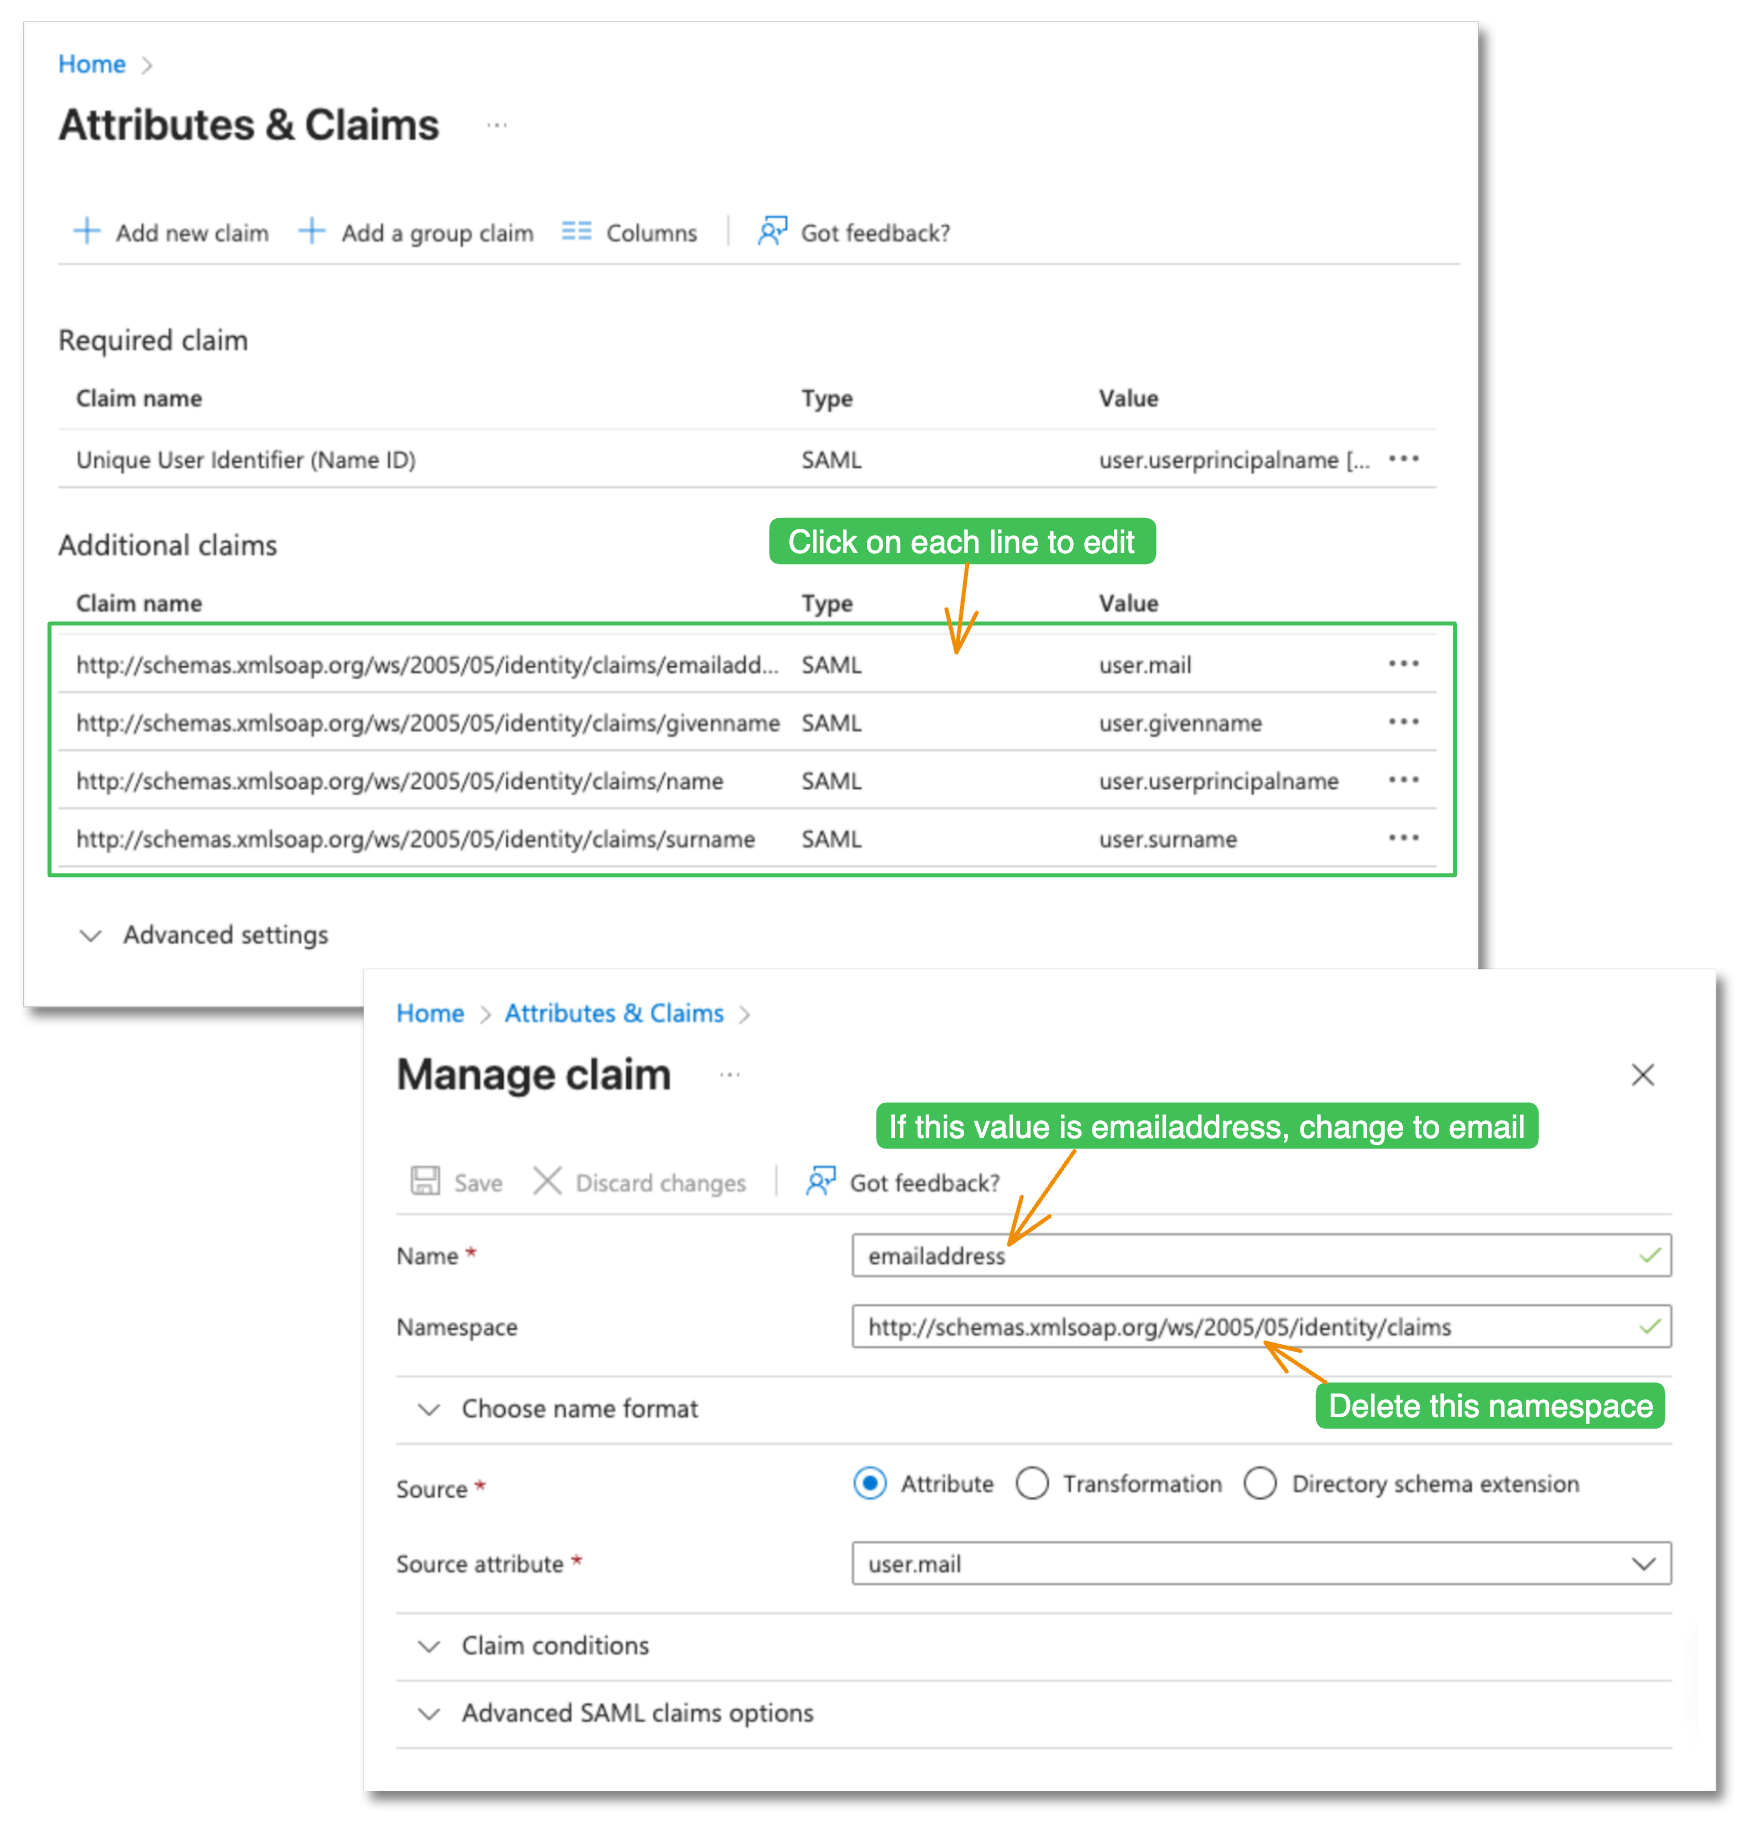
-
Click Save. After editing, the second section should look like this.
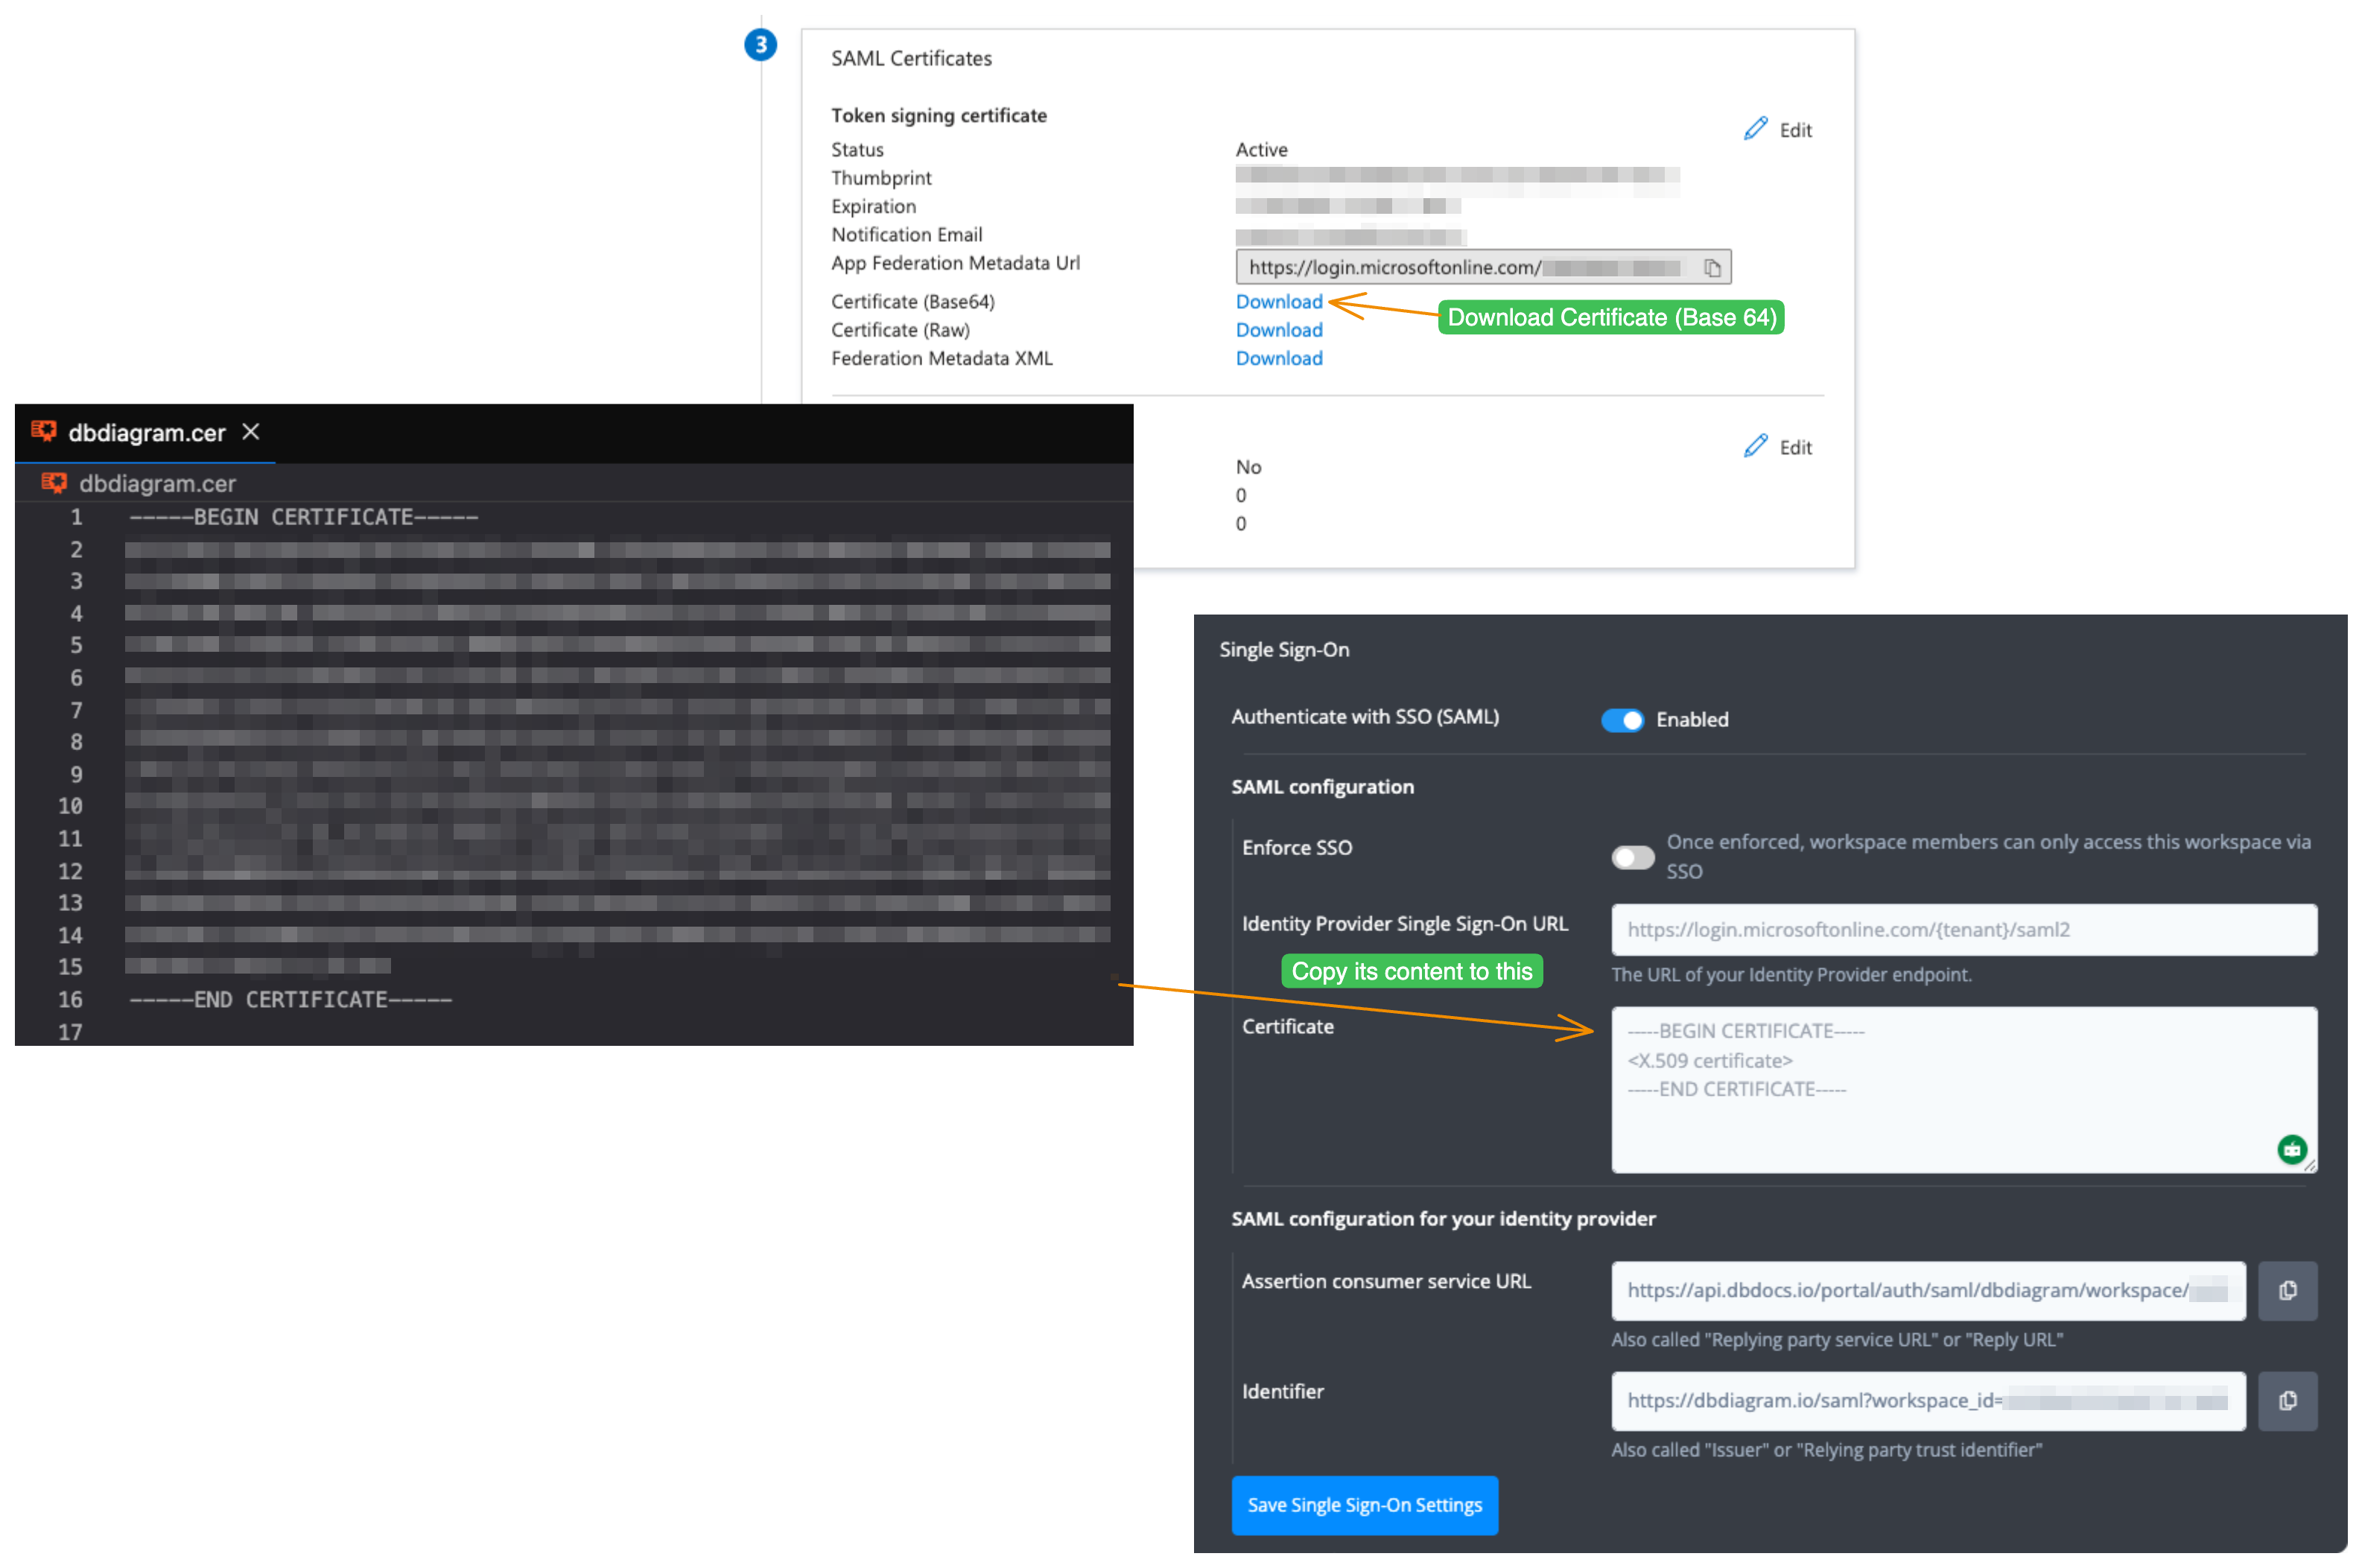
Section 3: SAML Signing Certificate
Download Certificate (Base64) from the section. Copy its content and paste it into the Certificate box of your Workspace SSO Configurations in dbdiagram.
Section 4: Set up dbdiagram
Copy the Login URL in the section 4 and paste it to Identity Provider Single Sign-On URL in your Workspace SSO Configurations in dbdiagram.
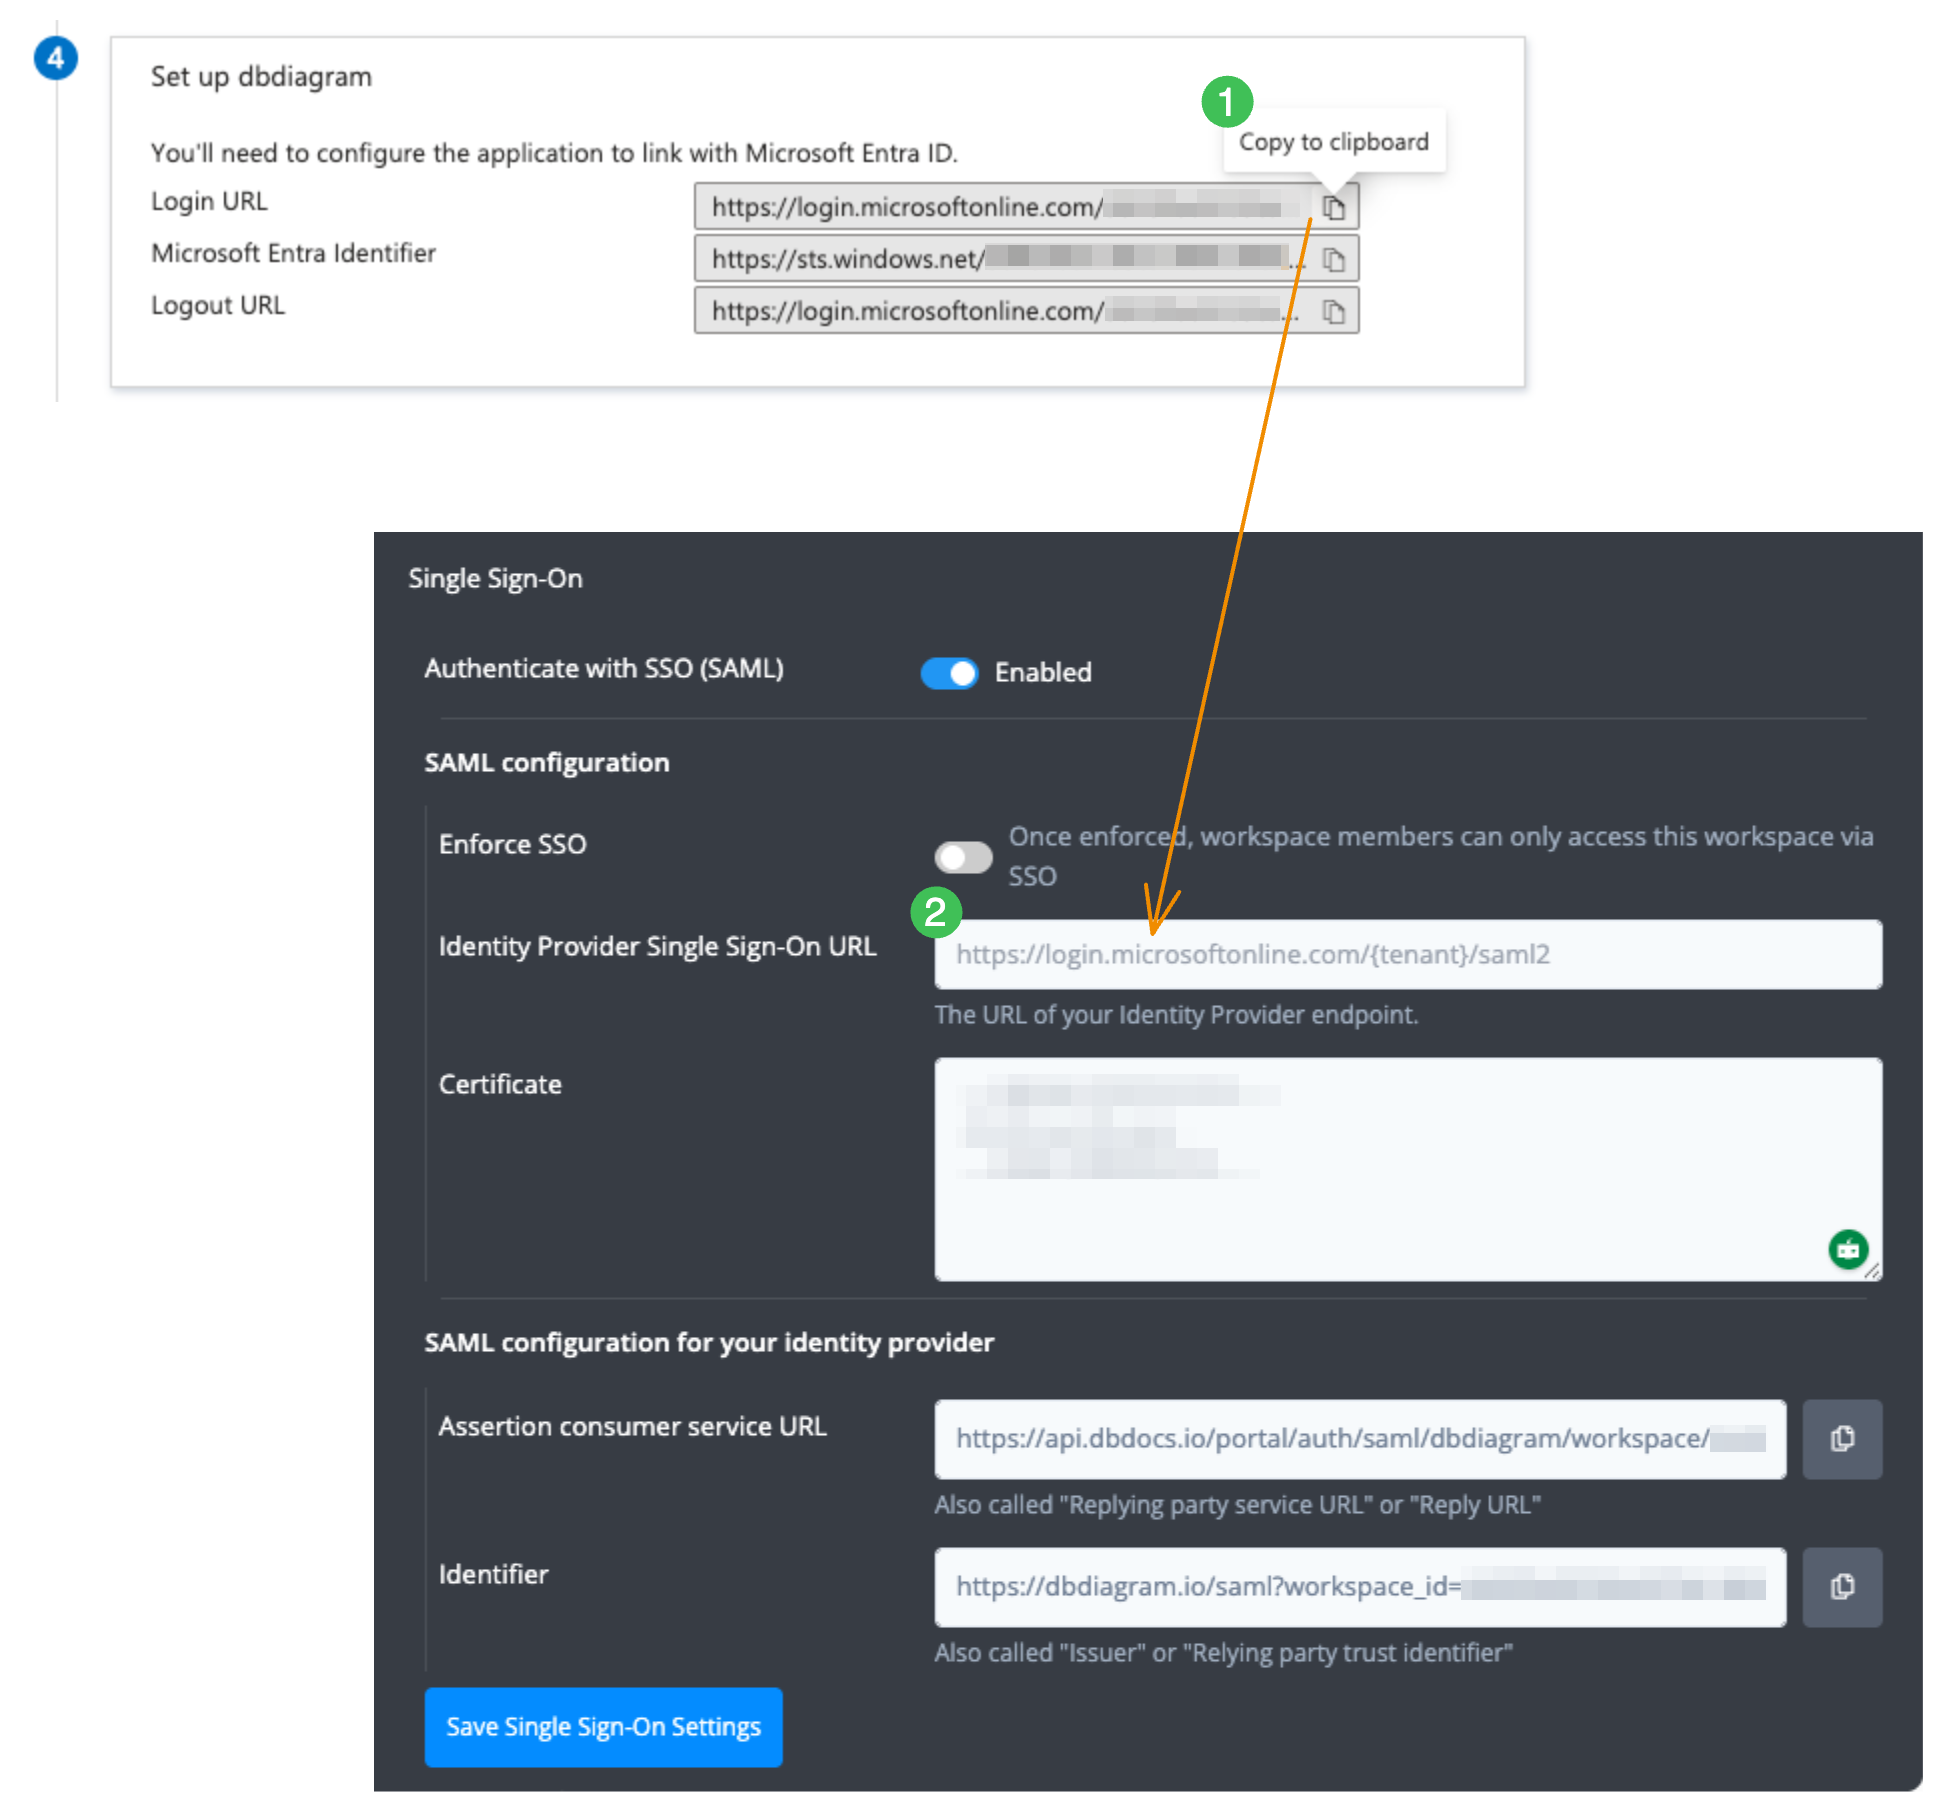
Remember to click Save Single Sign-On Settings to save your configurations
Section 5: Test single sign-on with dbdiagram
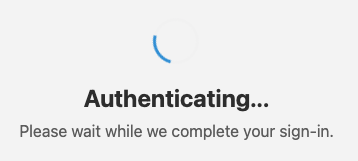
Click on Test in this section to verify your setup.

If you see the below screen, your setup is correct.