SSO Integration with Okta
These are instructions for setting up dbdiagram SAML SSO with Okta. If you use a different identity provider and need assistance with configuration, please contact us.
You can always follow steps on Okta's website here:
Add a private SSO integration | Okta Developer
Create a new application integration
- Sign-in method: SAML 2.0

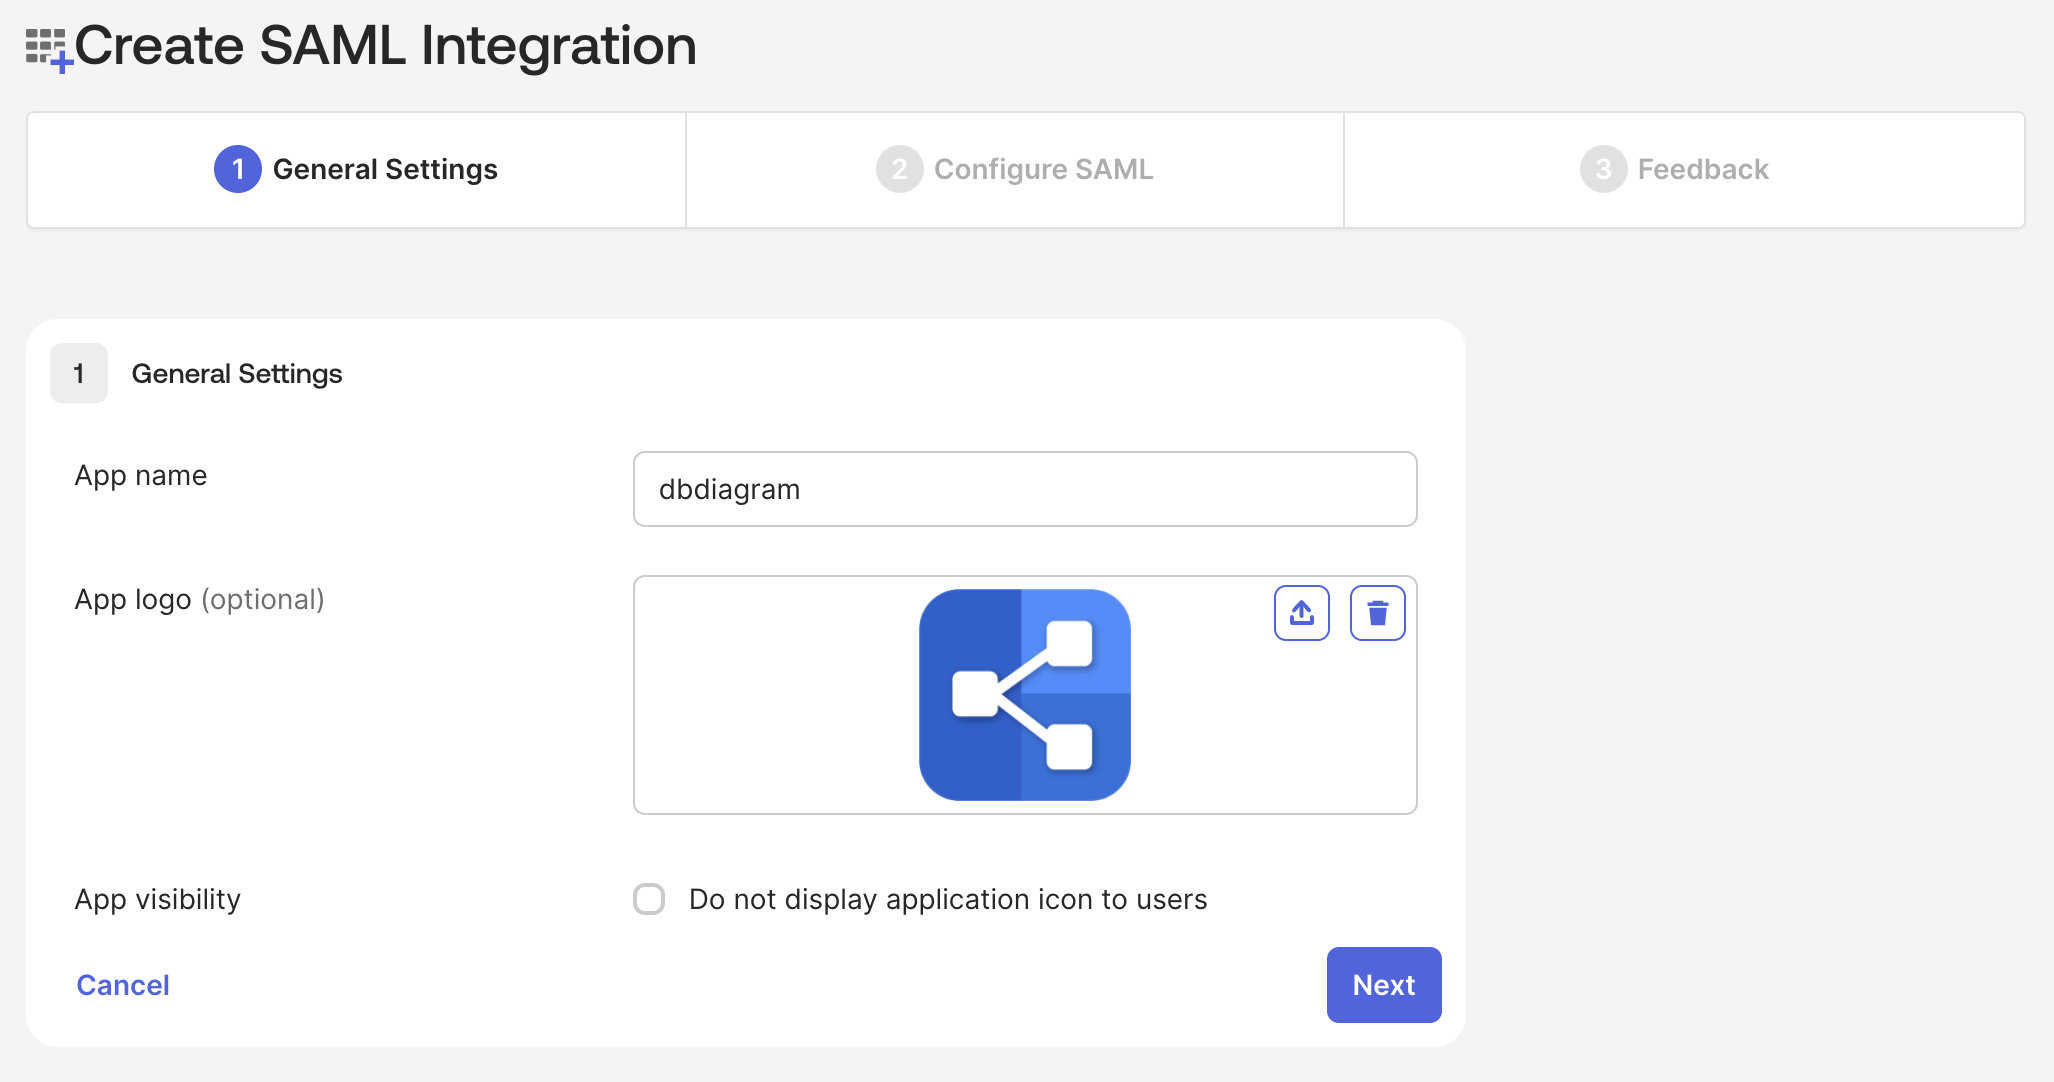
Create SAML integration
- App name:
dbdiagram - You can download dbdiagram logo via this link
SAML Settings
Configure the following settings in the SAML Settings section:
- Single sign-on URL: found inside
Assertion consumer service URL - Audience URI (SP Entity ID): found inside
Identifier
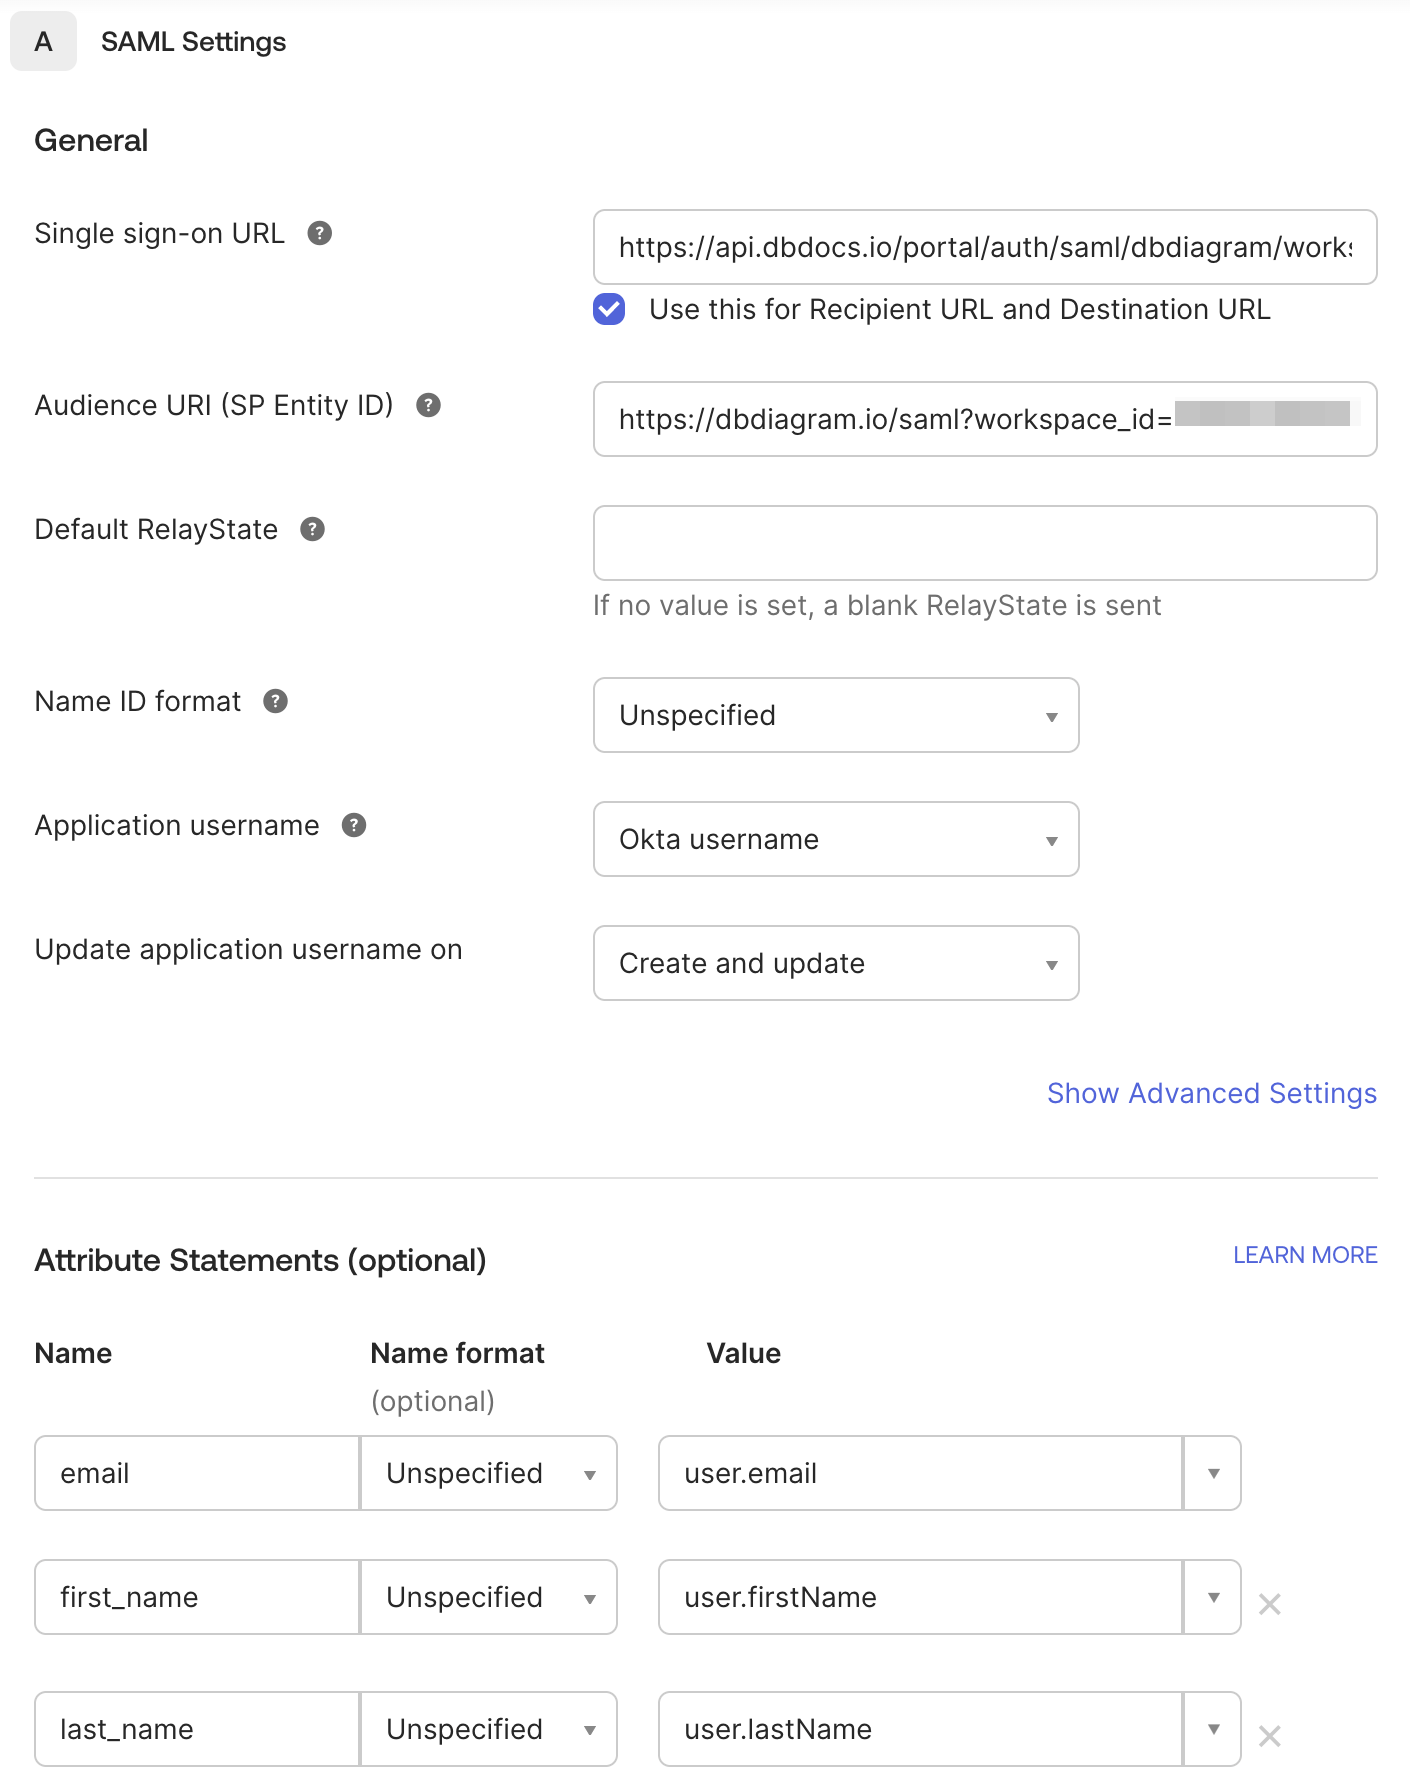
Configure the following additional settings:
- Name ID format: Identifies the SAML processing rules and constraints for the assertion's subject statement. You could use
Unspecifiedsince dbdiagram does not require any specific format. - Application username: Determines the default value for a user's application username. The application username will be used for the assertion's subject statement. You can select
Okta username. - Attribute statements (our recommended mapping):
- email → user.email
- first_name → user.firstName
- last_name → user.lastName
Assign users to dbdiagram
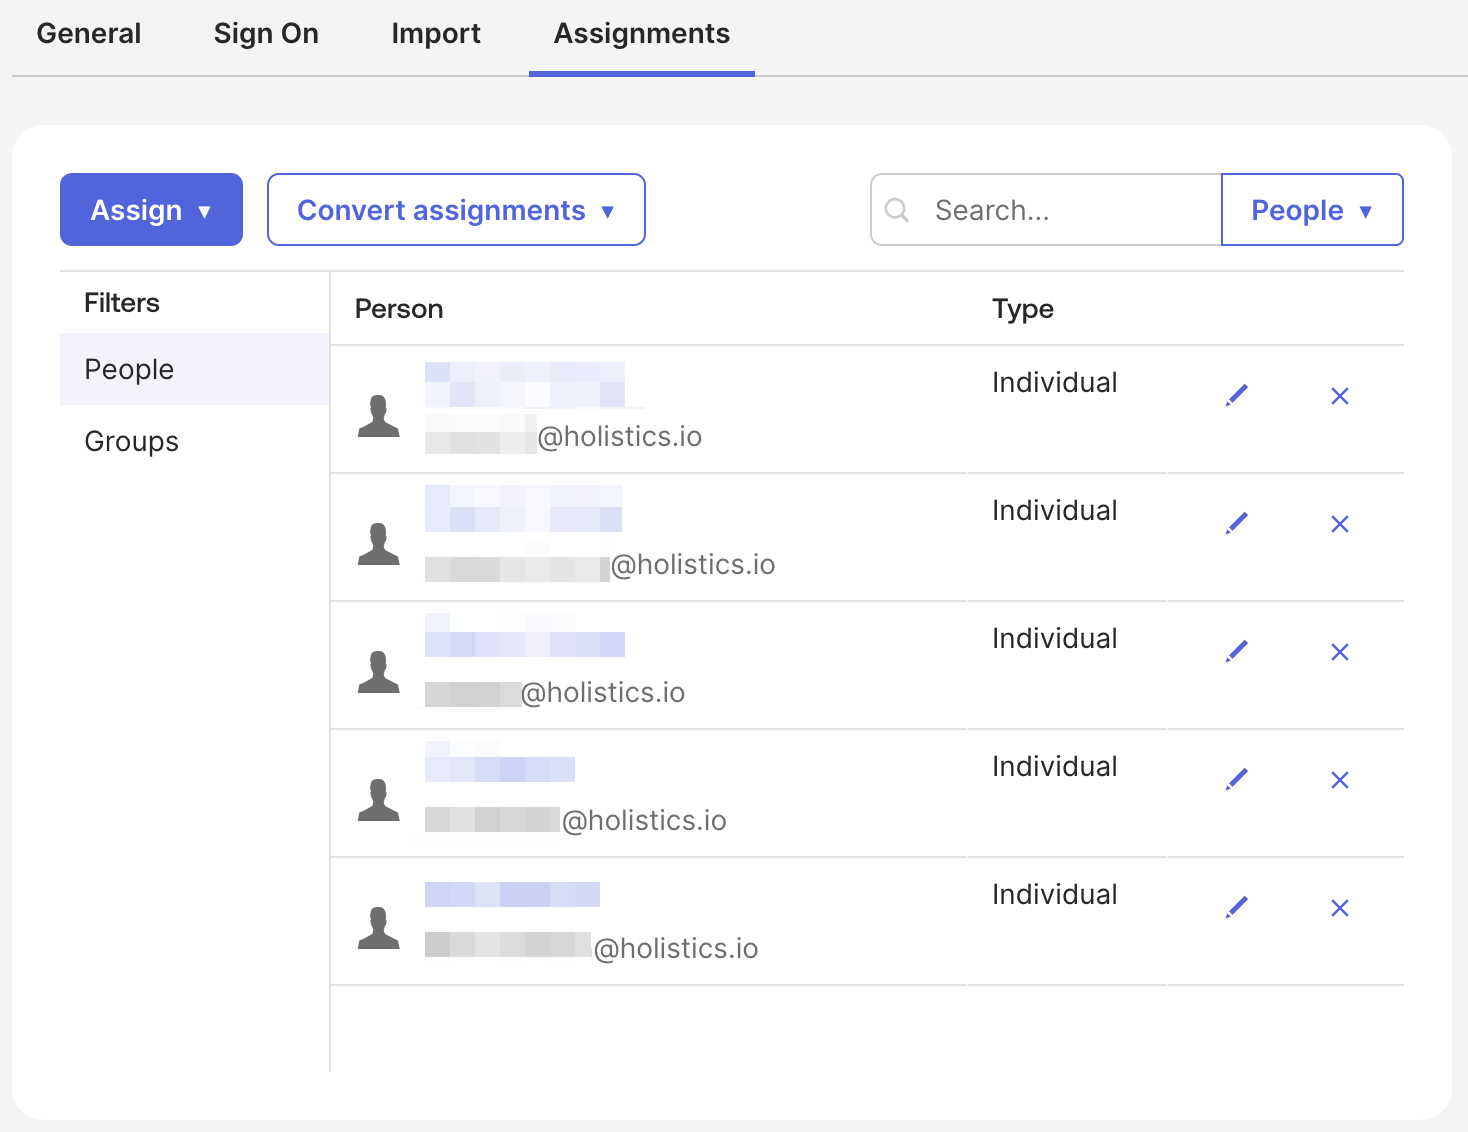
In Okta's Assignments tab, you can now assign users to dbdiagram.
We don't support Just-in-Time provisioning (automatically add workspace members on sign-in) so you need to assign your users manually.
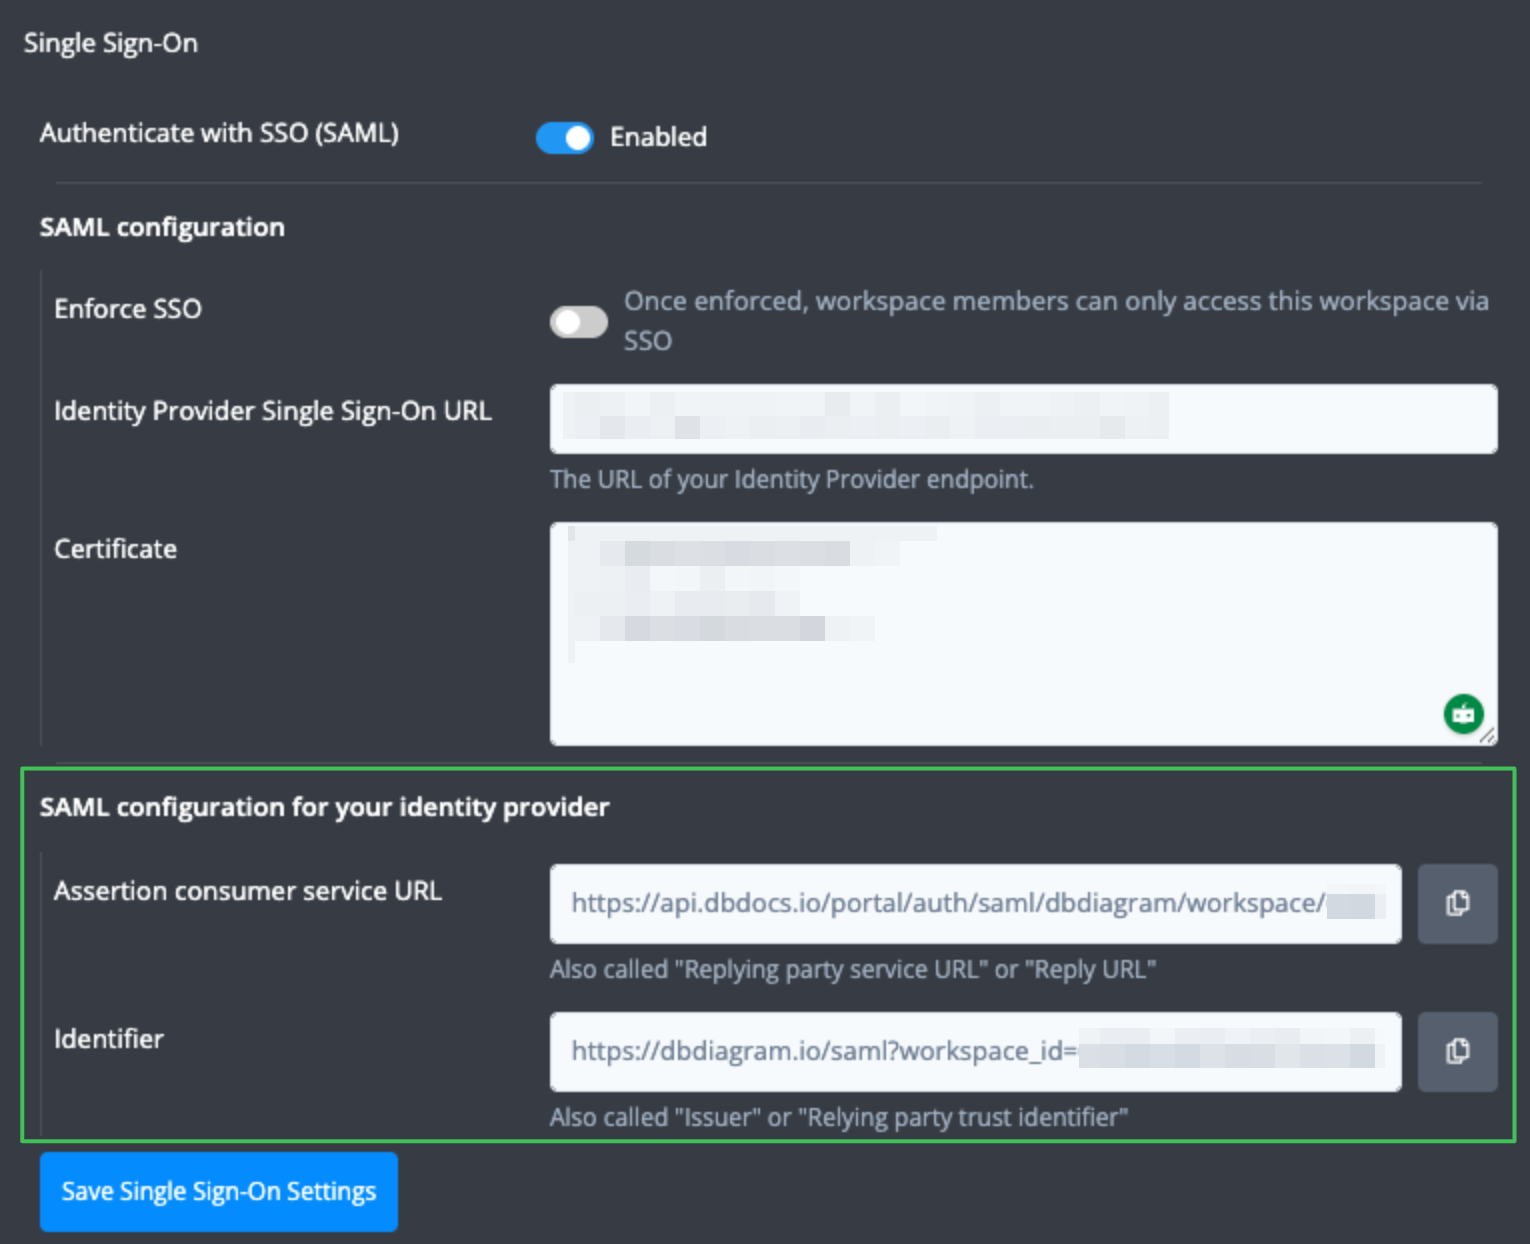
SAML Configuration for dbdiagram
Navigate to the Workspace Settings > Single Sign-On section > SAML configuration:
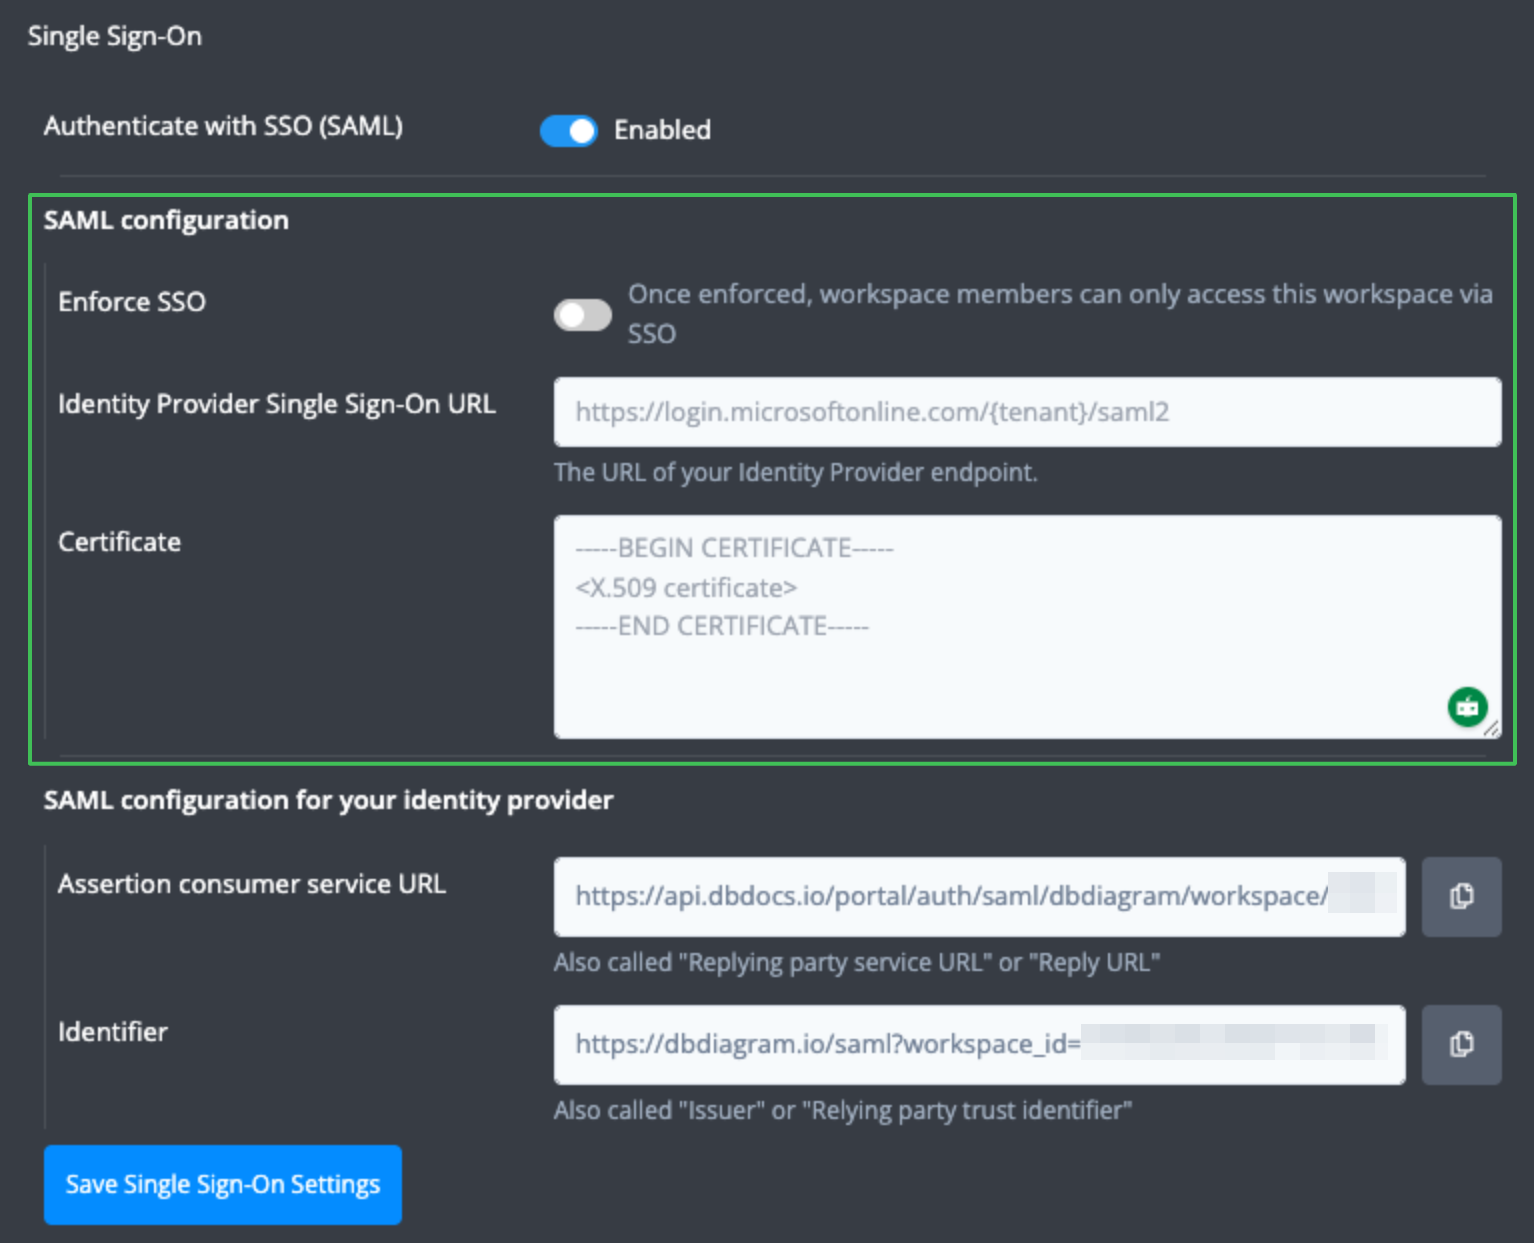
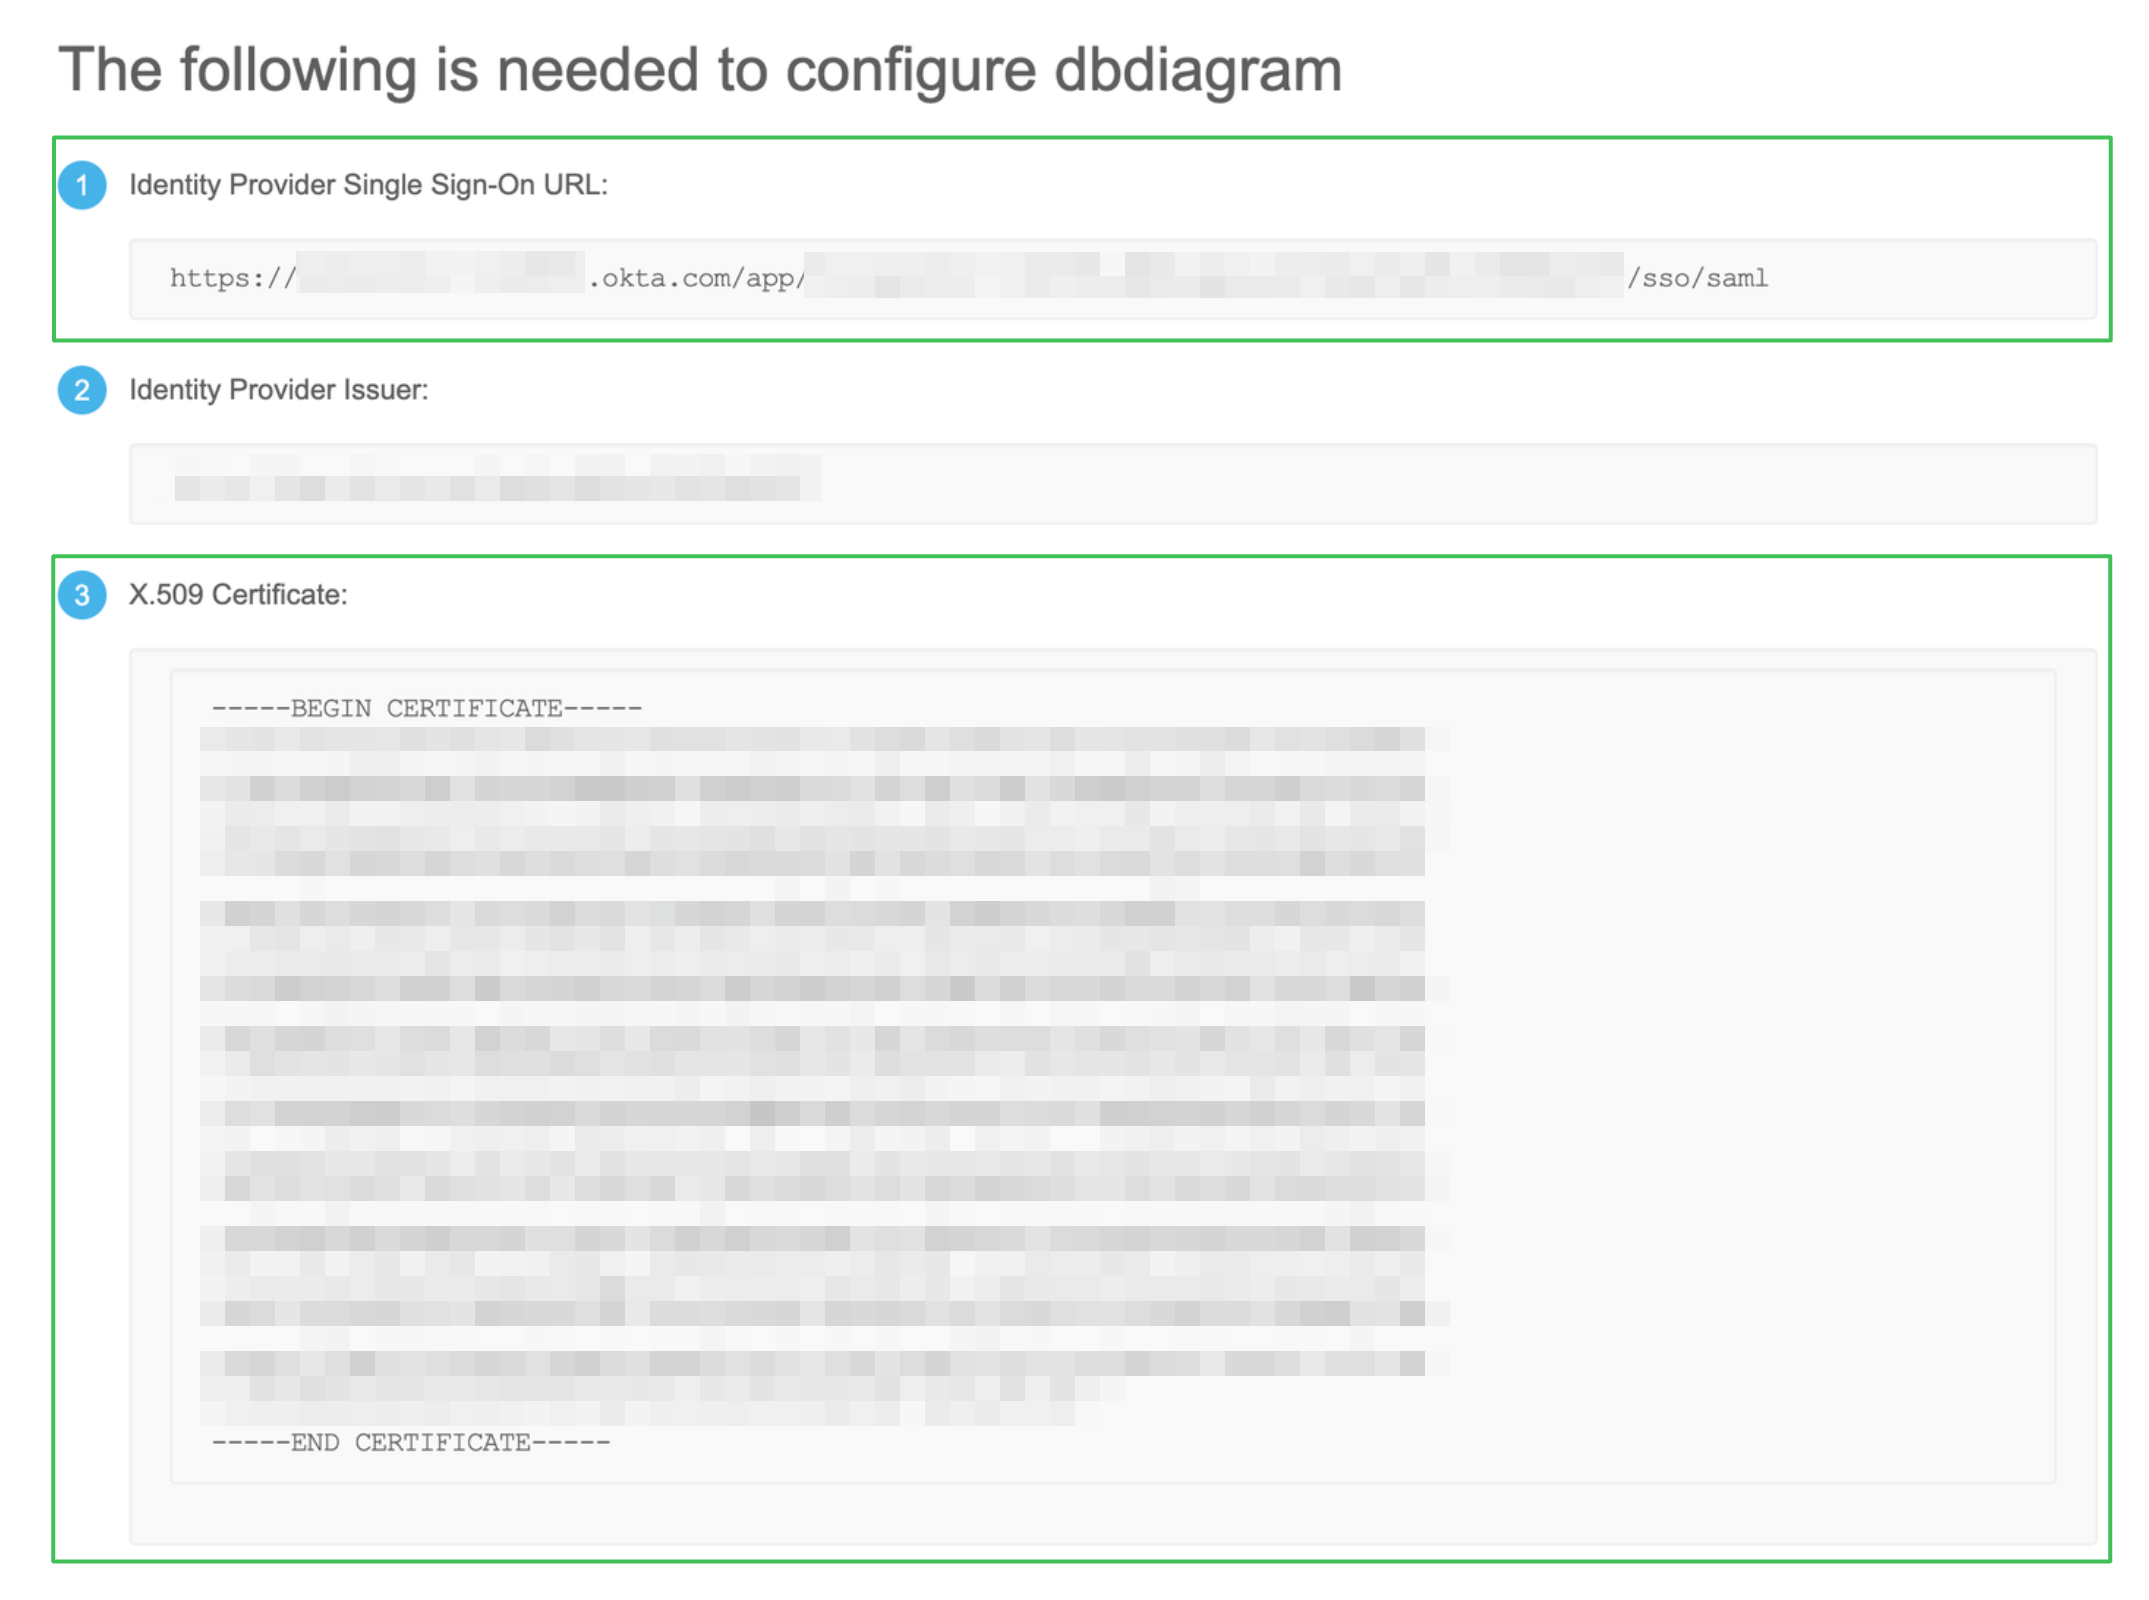
Then you need to fill in the values for Single Sign-On URL and Certificate from Okta. You can find them on the Sign On tab > View SAML setup instructions.

Copy the values of the Identity Provider Single Sign-On URL and X.509 Certificate fields and paste them into dbdiagram's SAML configuration to complete your setup.